

R version 4.4.0 (2024-04-24)
Platform: x86_64-apple-darwin20
Running under: macOS 15.0

Matrix products: default
BLAS:   /Library/Frameworks/R.framework/Versions/4.4-x86_64/Resources/lib/libRblas.0.dylib
LAPACK: /Library/Frameworks/R.framework/Versions/4.4-x86_64/Resources/lib/libRlapack.dylib;  LAPACK version 3.12.0

locale:
[1] en_US.UTF-8/en_US.UTF-8/en_US.UTF-8/C/en_US.UTF-8/en_US.UTF-8

time zone: Asia/Kolkata
tzcode source: internal

attached base packages:
[1] stats     graphics  grDevices utils     datasets  methods   base

other attached packages:
 [1] palmerpenguins_0.1.1 lubridate_1.9.3      forcats_1.0.0
 [4] stringr_1.5.1        dplyr_1.1.4          purrr_1.0.2
 [7] readr_2.1.5          tidyr_1.3.1          tibble_3.2.1
[10] ggplot2_3.5.1        tidyverse_2.0.0      downlit_0.4.4

loaded via a namespace (and not attached):
 [1] gtable_0.3.5      jsonlite_1.8.8    compiler_4.4.0    tidyselect_1.2.1
 [5] scales_1.3.0      yaml_2.3.10       fastmap_1.2.0     R6_2.5.1
 [9] generics_0.1.3    knitr_1.48        munsell_0.5.1     pillar_1.9.0
[13] tzdb_0.4.0        rlang_1.1.4       utf8_1.2.4        stringi_1.8.4
[17] cachem_1.1.0      xfun_0.47         timechange_0.3.0  memoise_2.0.1
[21] cli_3.6.3         withr_3.0.1       magrittr_2.0.3    digest_0.6.37
[25] grid_4.4.0        rstudioapi_0.16.0 hms_1.1.3         lifecycle_1.0.4
[29] vctrs_0.6.5       evaluate_0.24.0   glue_1.7.0        fansi_1.0.6
[33] colorspace_2.1-1  rmarkdown_2.28    tools_4.4.0       pkgconfig_2.0.3
[37] htmltools_0.5.8.1

Jai Bhim!
Dr. Kiran Koli & Dr. Ajay Koli
Founder & Director
SARA Institute of Data Science
Star this course on GithubReference
These slides are prepared using this book “Computer Basics: Absolute Beginner’s Guide” (10th edition, 2023) by Michael Miller.
Computers

Mid 1980s.
🥶 First time you sit in front of computer.
In 21st century computers are extremely important part of our life.
Personal computer types


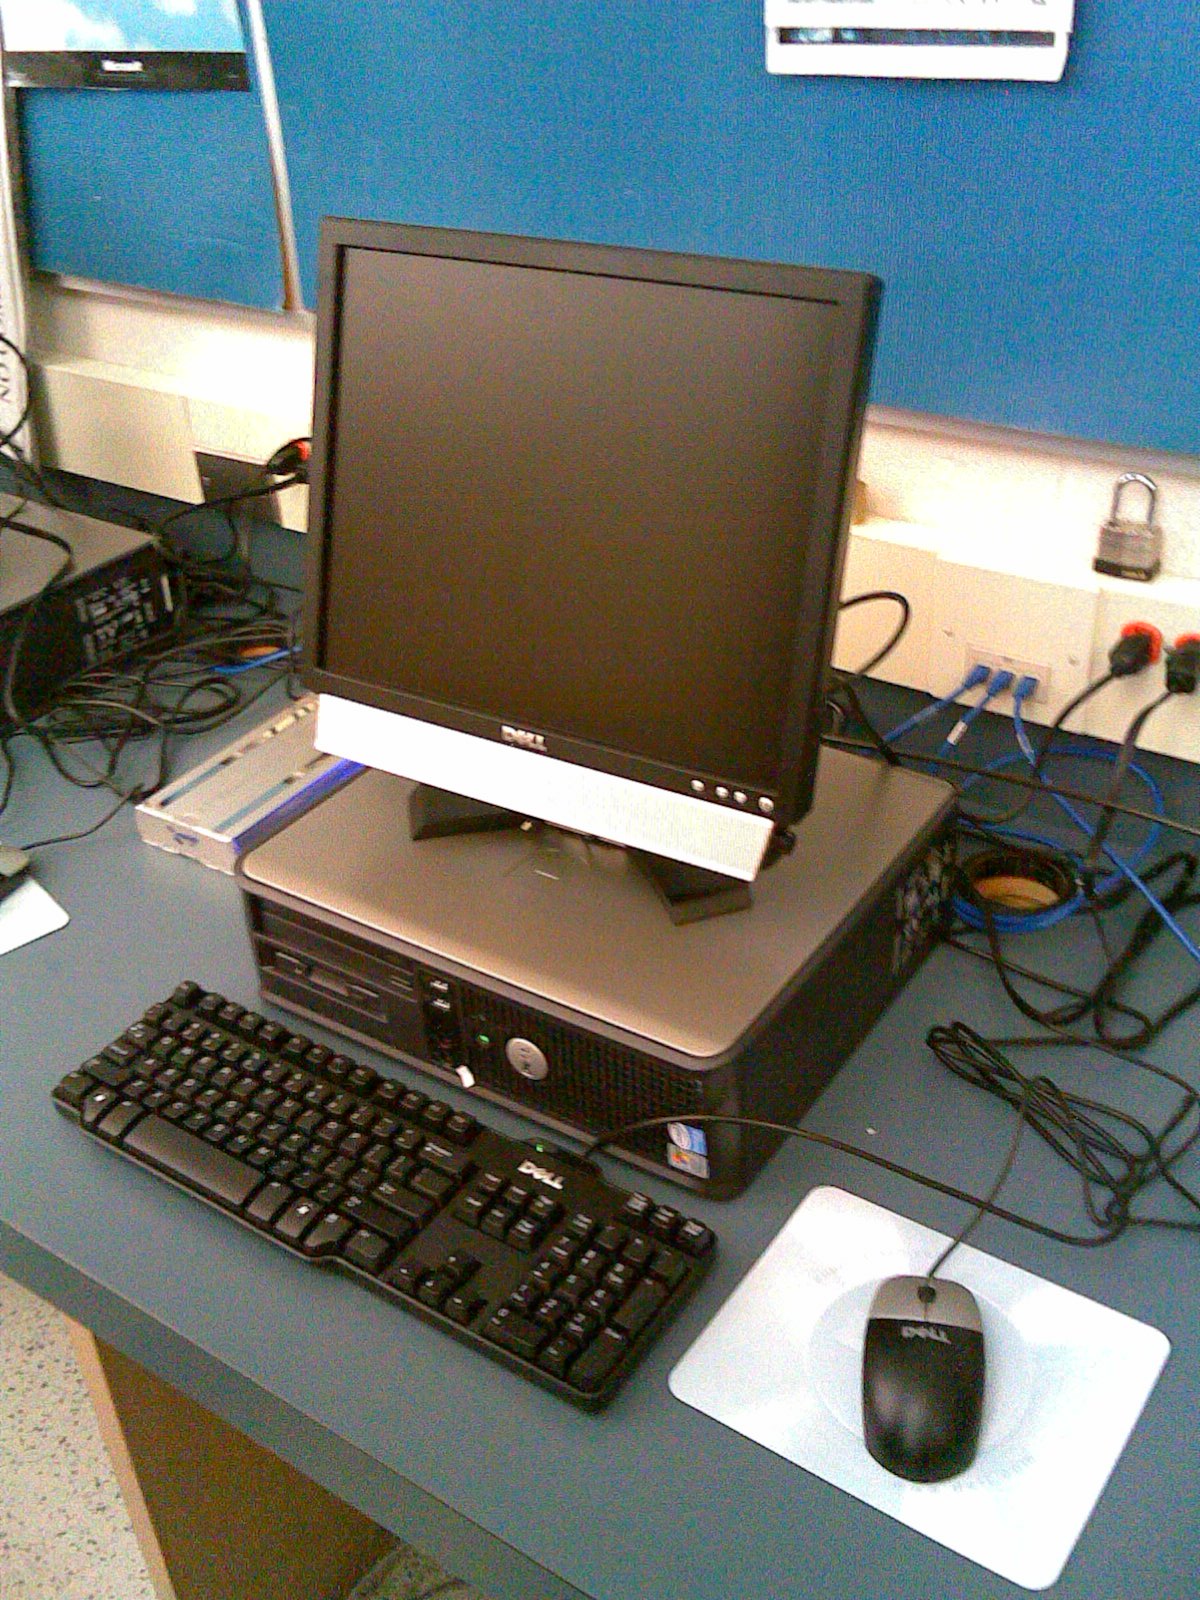
The Motherboard
Home to Almost Everything
Computer chips and circuit boards are connected to a big circuit called a motherboard

Microprocessor:
The main engine


The specific chip that controls your entire computer system is buried on the motherboard. This chip is called a microprocessor or a central processing unit (CPU).
- Its speed today is measured in
gigahertz(GHz)
Computer memory
Temporary storage

Your instructions to computer are temporarily held in the computer’s random access memory (RAM).
The more memory that’s available in a machine, the more instructions and data that can be stored at one time.
You can add extra memory
Hard Disk Drives
Long-term storage
It permanently stores all your important data. It can store multiple terabytes (TB) of data.

Warning
- If you try to reformat your hard disk, you will erase all the programs and data that have installed on your computer – SO DO NOT DO IT!
Solid-State Drives (SSD)
Faster Long-Term Storage

This type of storage is much faster than traditional hard disk storage
SSDis little more expensive than hard disk.
Keyboards:
Computers receive data by reading it from disk, through modem or receiving input directly from you, the user.
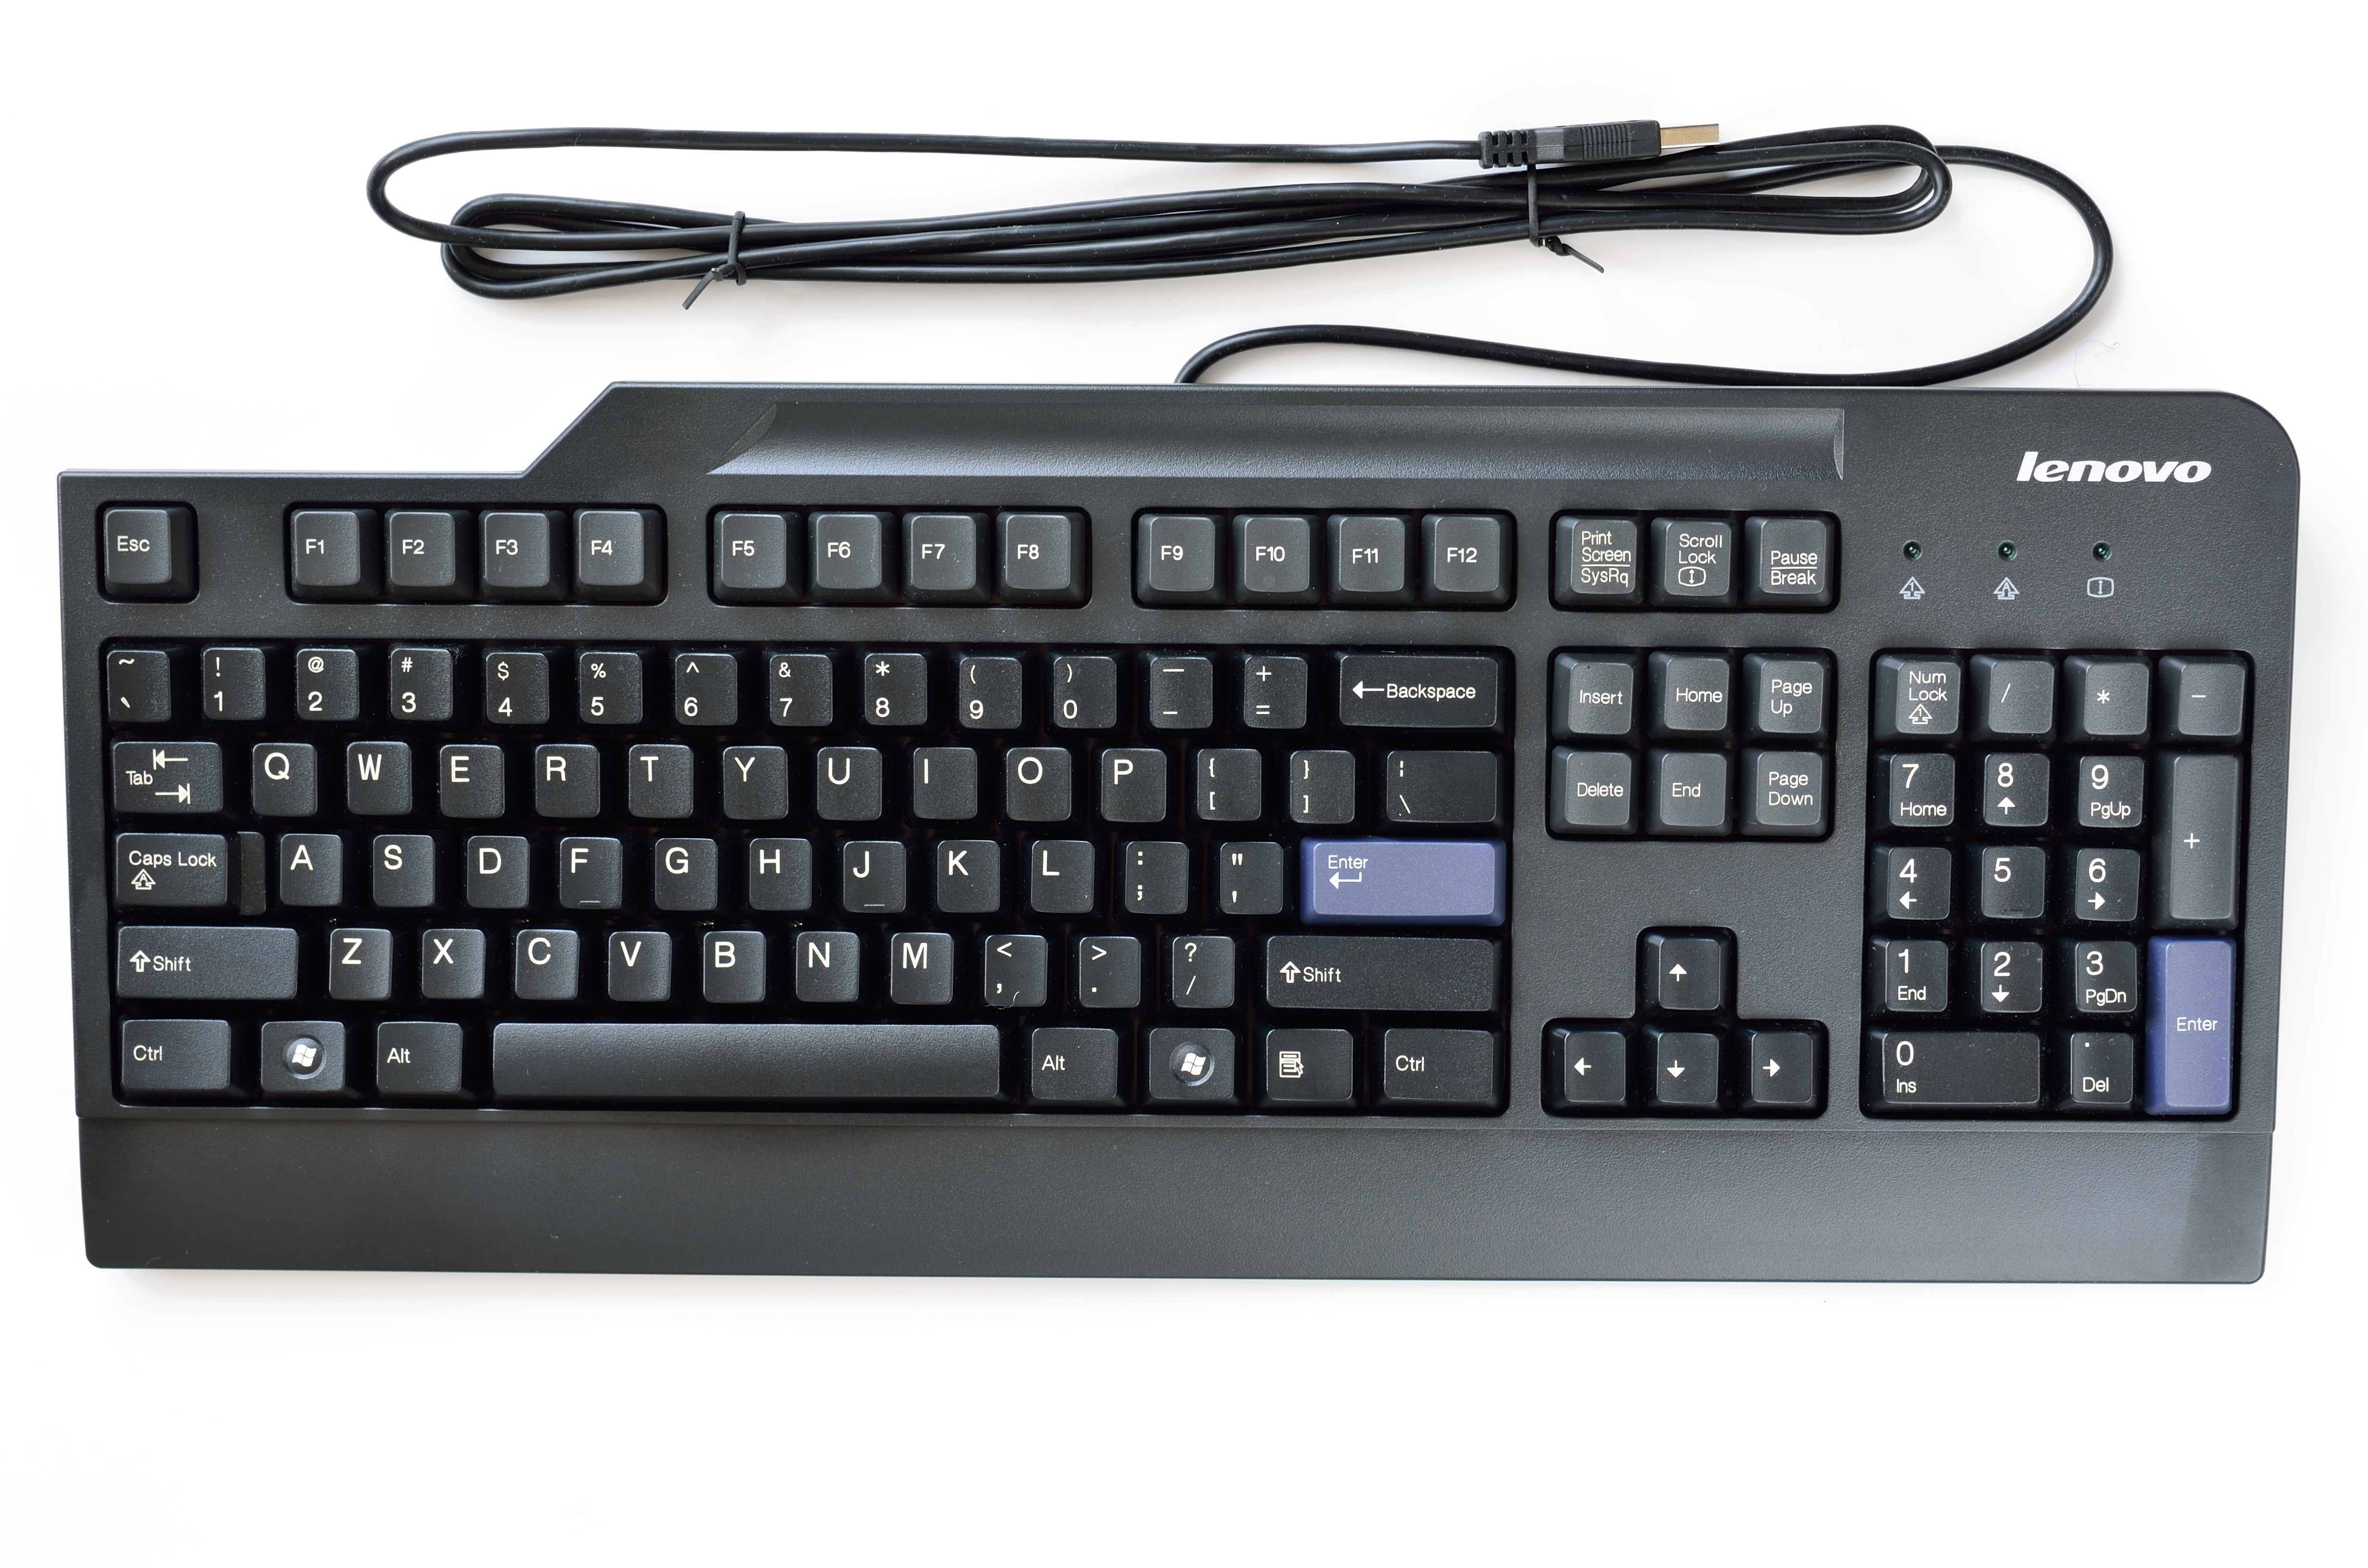
- An
input device, the most common input device you use to talk to your computer is the keyboard.
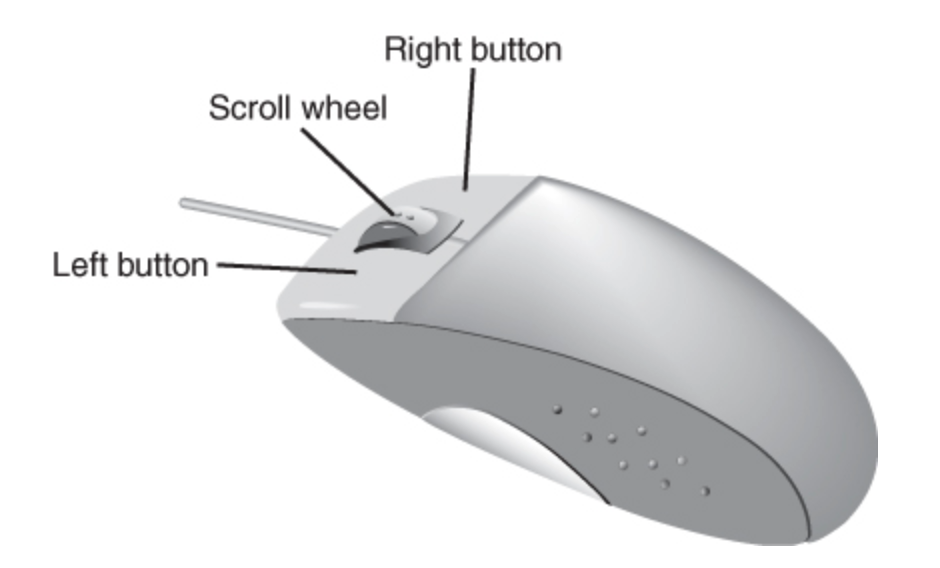
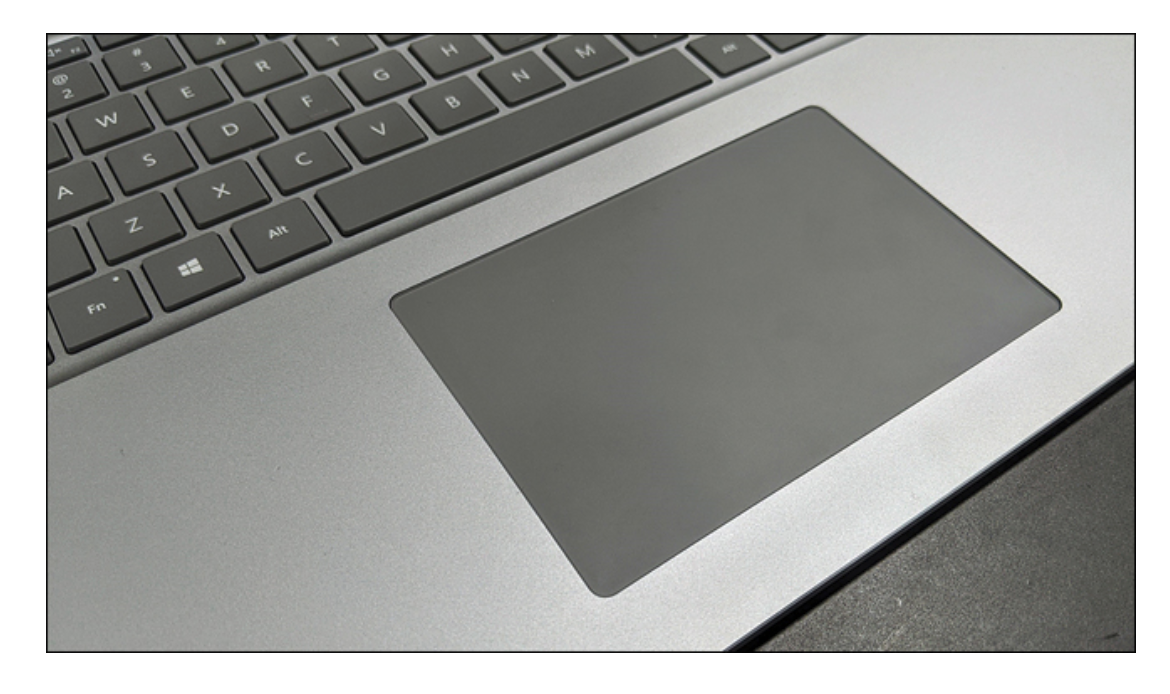
Mice and Touchpads
Point and click input devices
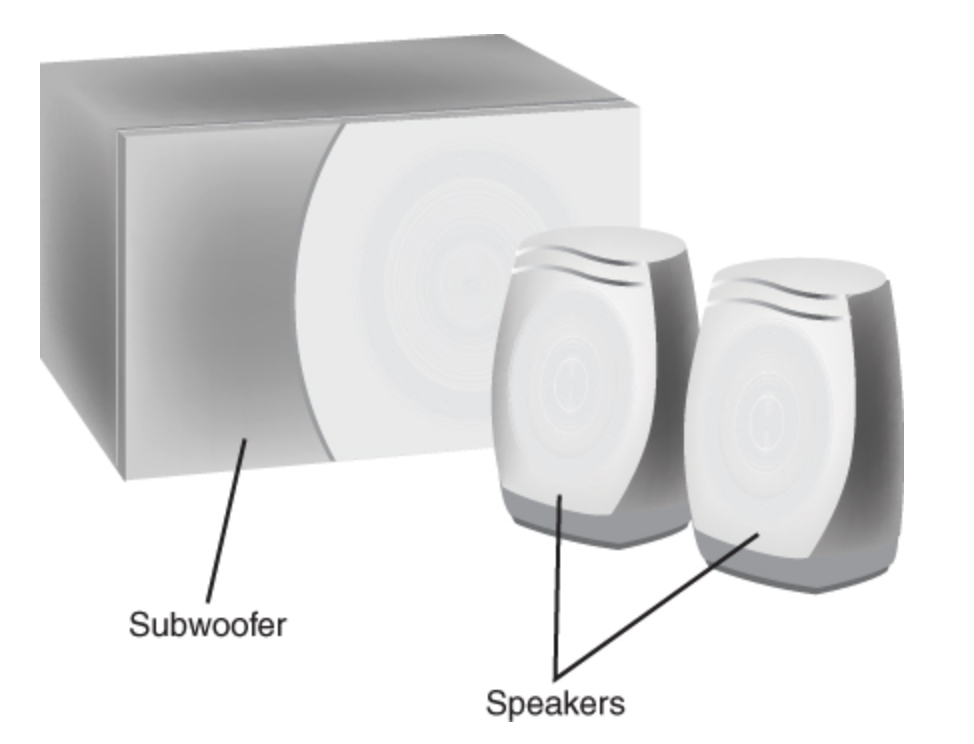
Sound cards and speakers
Making noise
All speaker systems are driven by a sound card or chip that is installed inside your system unit.
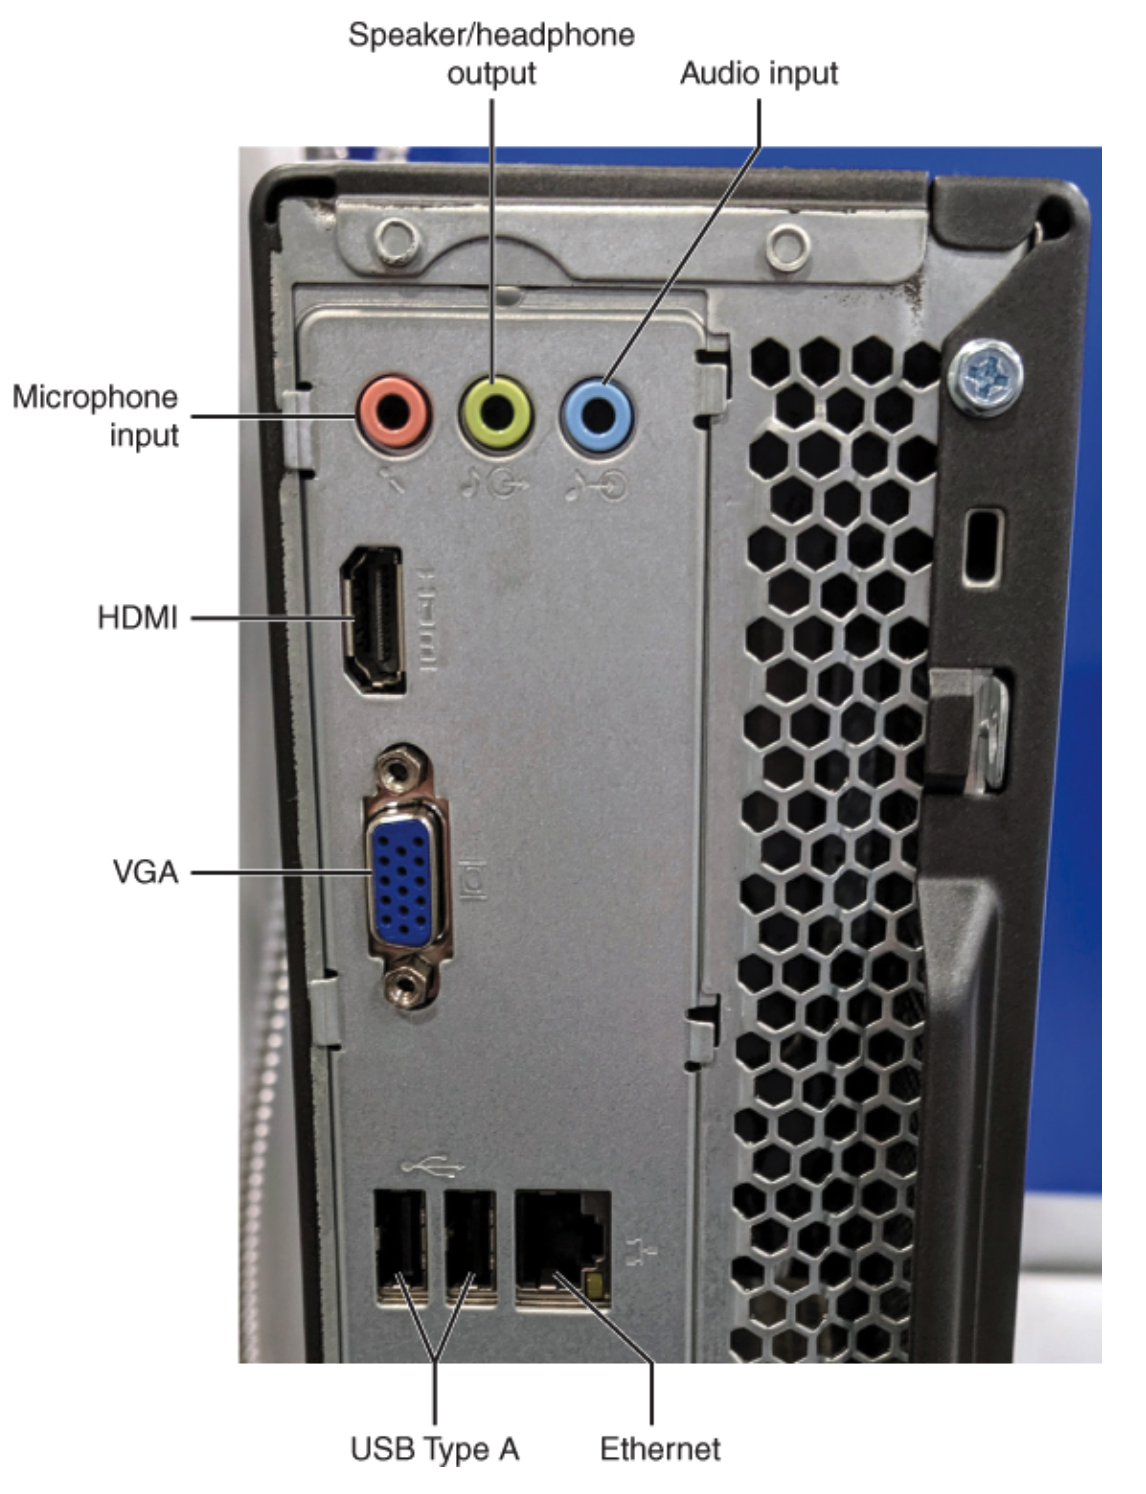
Other parts of your computer
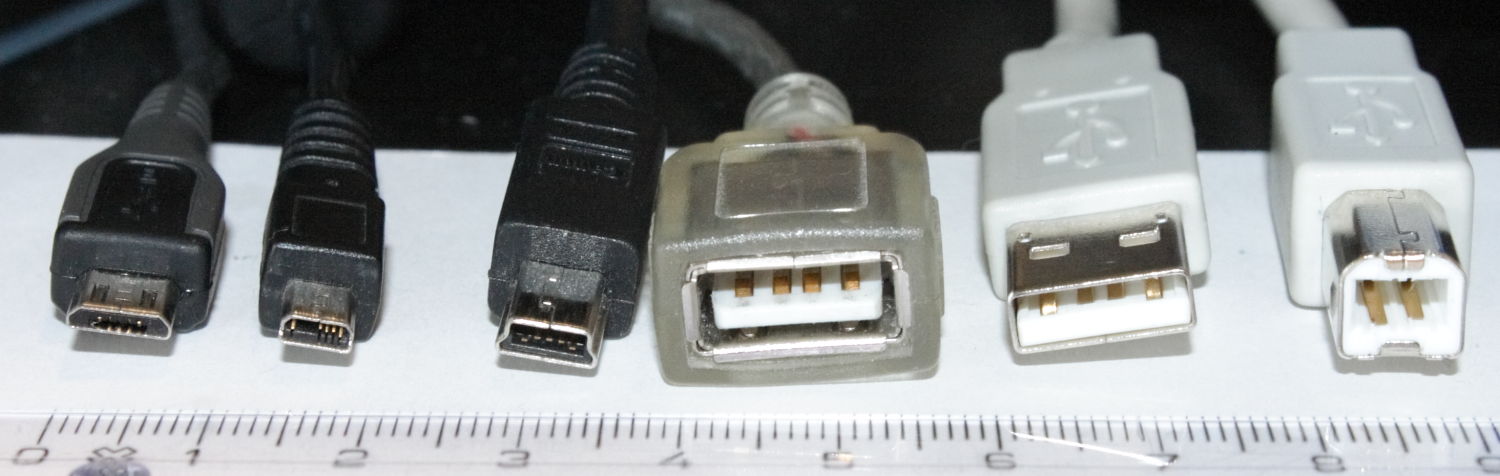
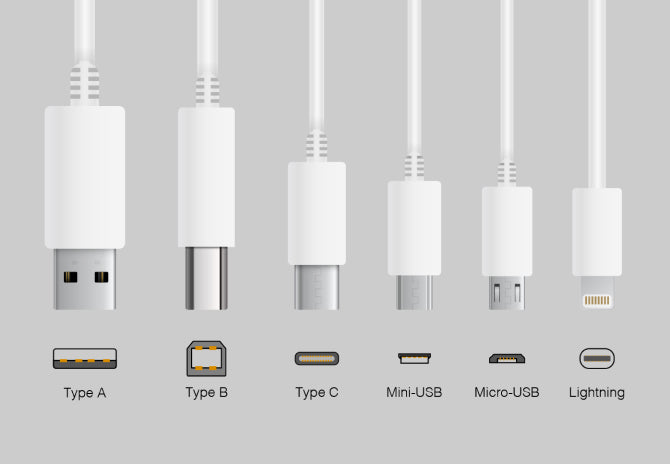
Other devices connect using a special type of cable called a USB (Universal Serial Bus) cable. All computers have multiple USB connections (sometimes called ports).
Printers
To make hard copy of documents and pictures, also includes copying, scanning, and even faxing capability.

Webcams
Small cameras to send live video

Joysticks and game pads
To play the most challenging computer games.

External storage
Just like the hard disk or solid state drives inside your computer, but they connect externally to help you back up your precious data.

Make everything work with OS

You interface with your computer via a special piece of software called an
operating system.This program makes your system operate; it is your gateway to the hardware part of your system.
Famous Operating Systems

Most computers today come with an OS called Microsoft Windows. It is around 35 years old and is published by Microsoft Corporation.
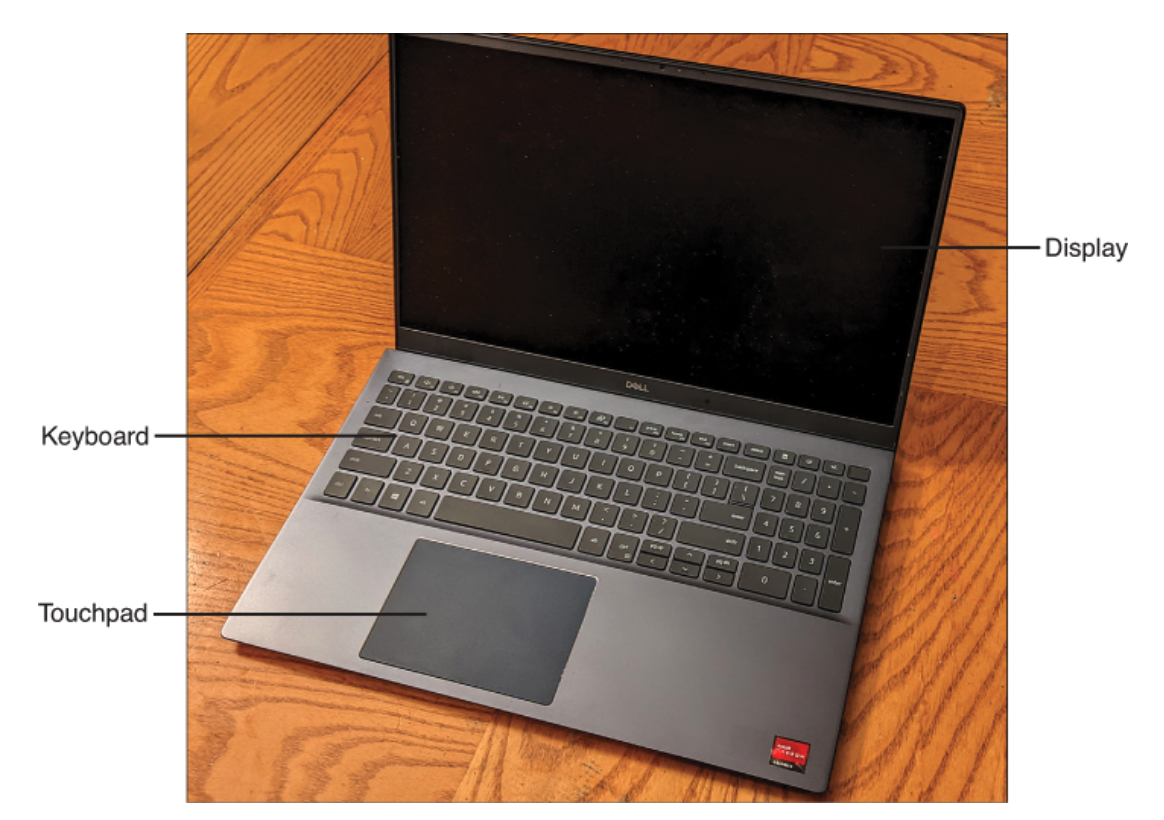
Laptop
Laptop also called notebook today are the most popular PC.

Convertible laptop
2-in-1 PC or 2-in-1 tablet

All-in-One Desktop PC
Traditional Desktop PC
USING
Know Windows 11
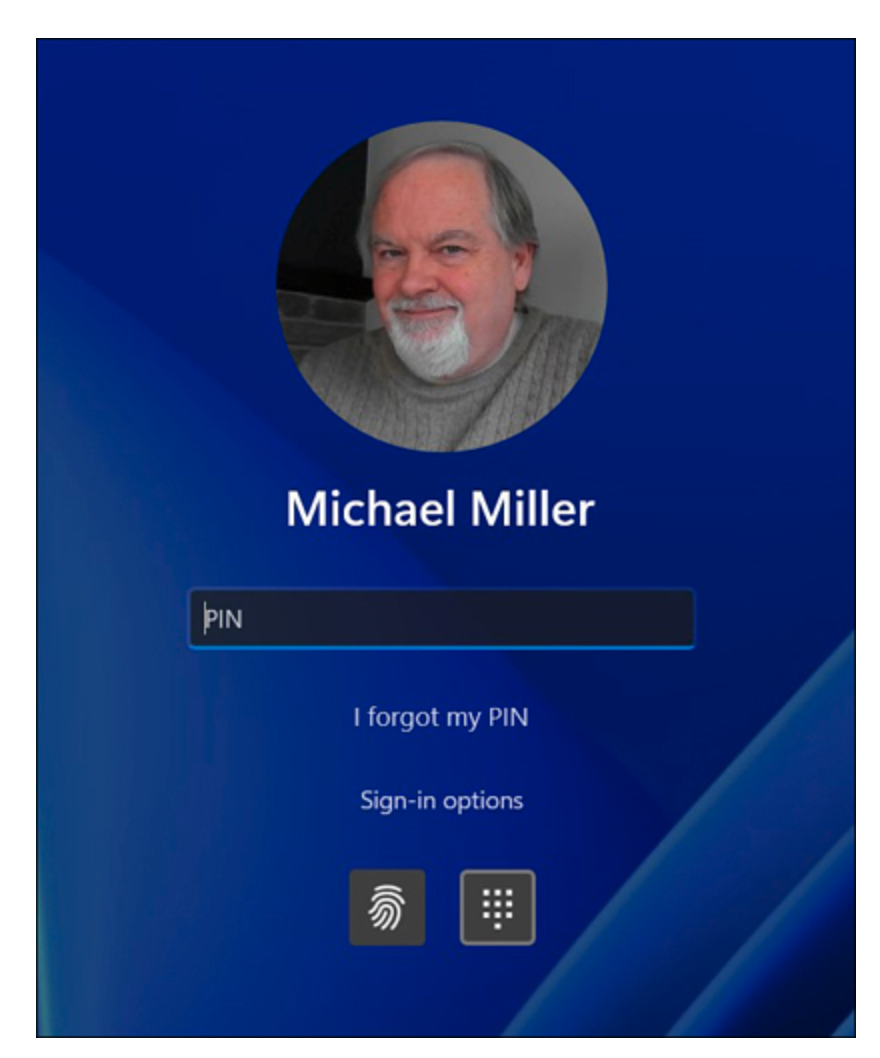
Starting and Logging in to Windows
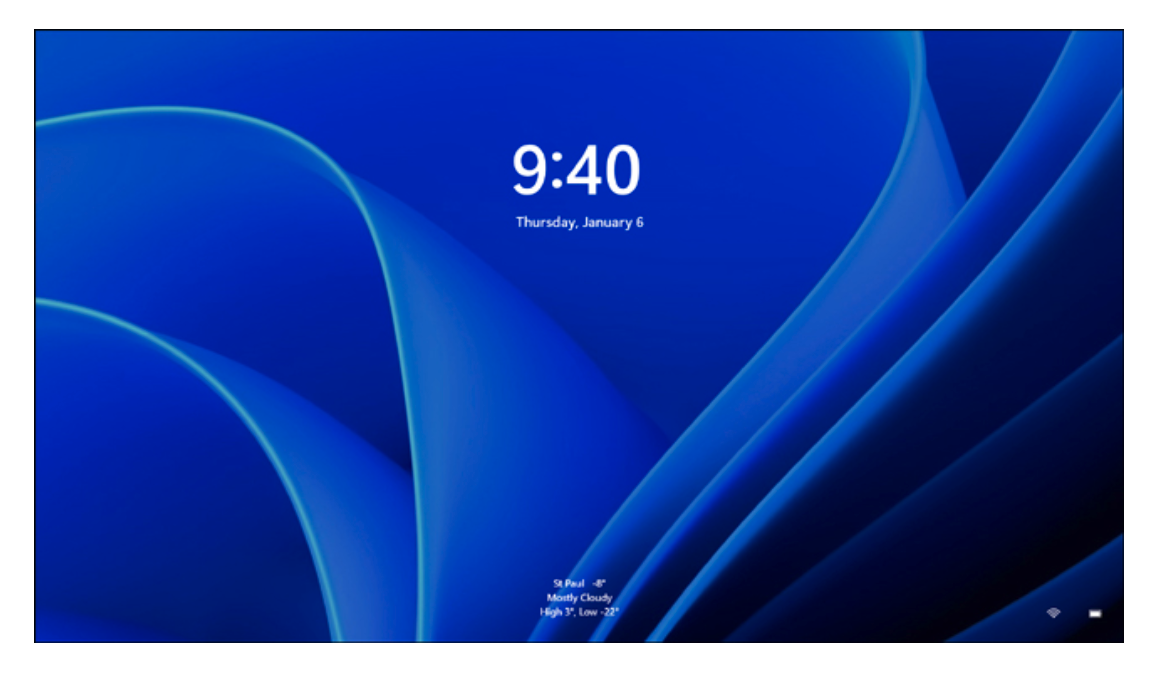
Know Windows 11
Starting and Logging in to Windows
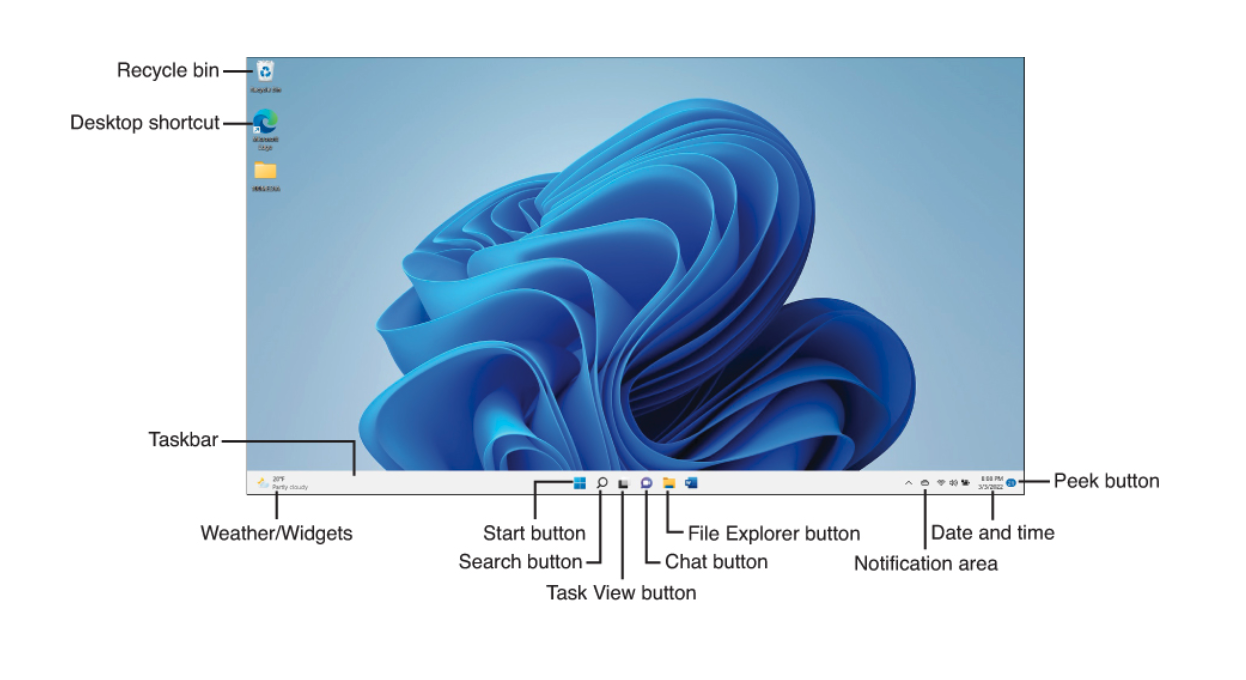
Exploring the Windows Desktop
The desktop is your home base in Windows. It is where all your programs and documents reside.
Moving and Resizing Windows

Warning
If you try to close a window that contains a document you haven’t saved, you’re prompted to save the changes to the document. Because you probably don’t want to lose any of your work, click Yes to save the document, and then close the program.
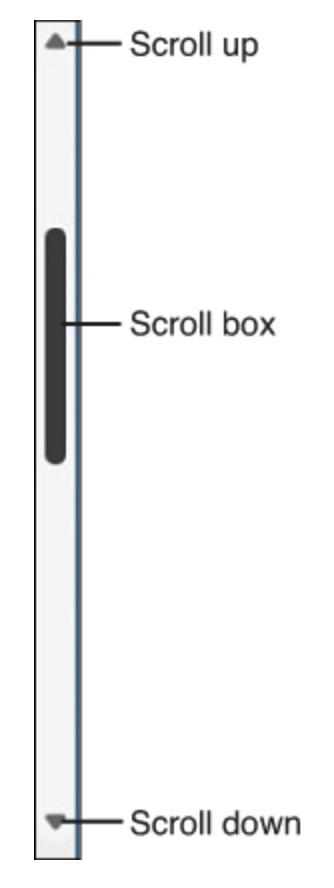
Scrolling Through a Window
Tip
On touch pad use two fingers to move the page up or down
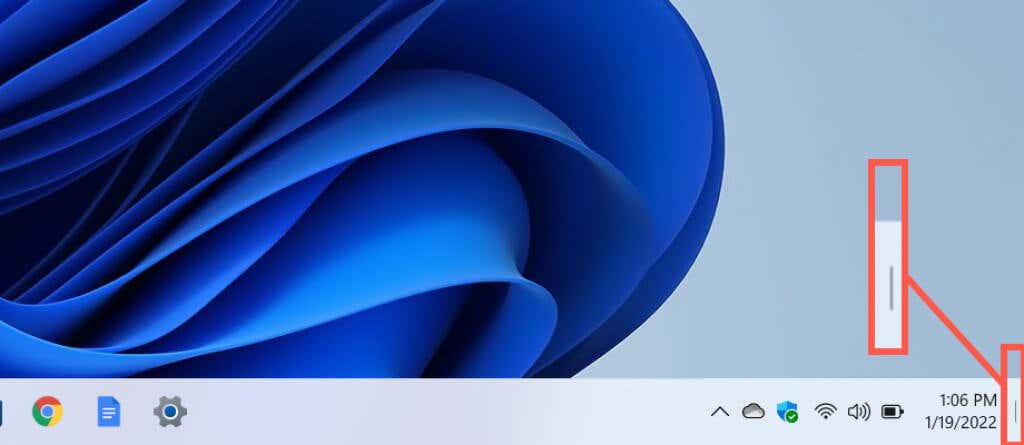
Peeking at the Desktop
To minimize all open windows so that you can see the open desktop.
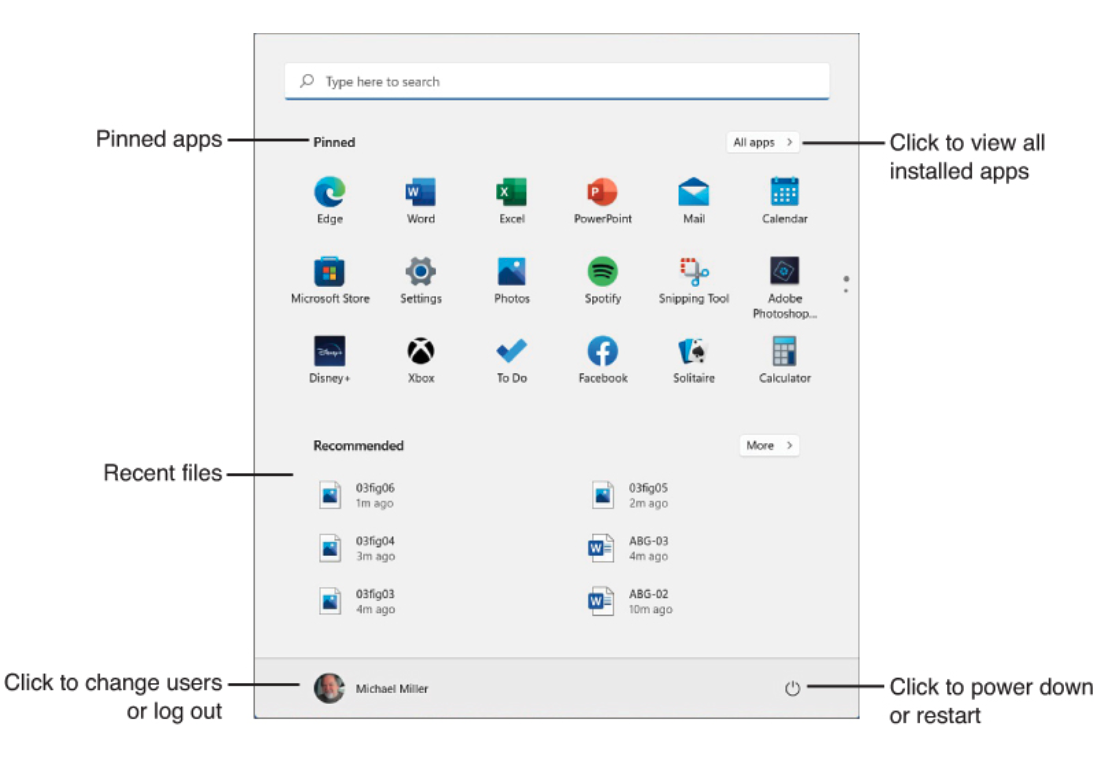
Navigating the Start Menu
Access all the programs on your system from the Start menu.
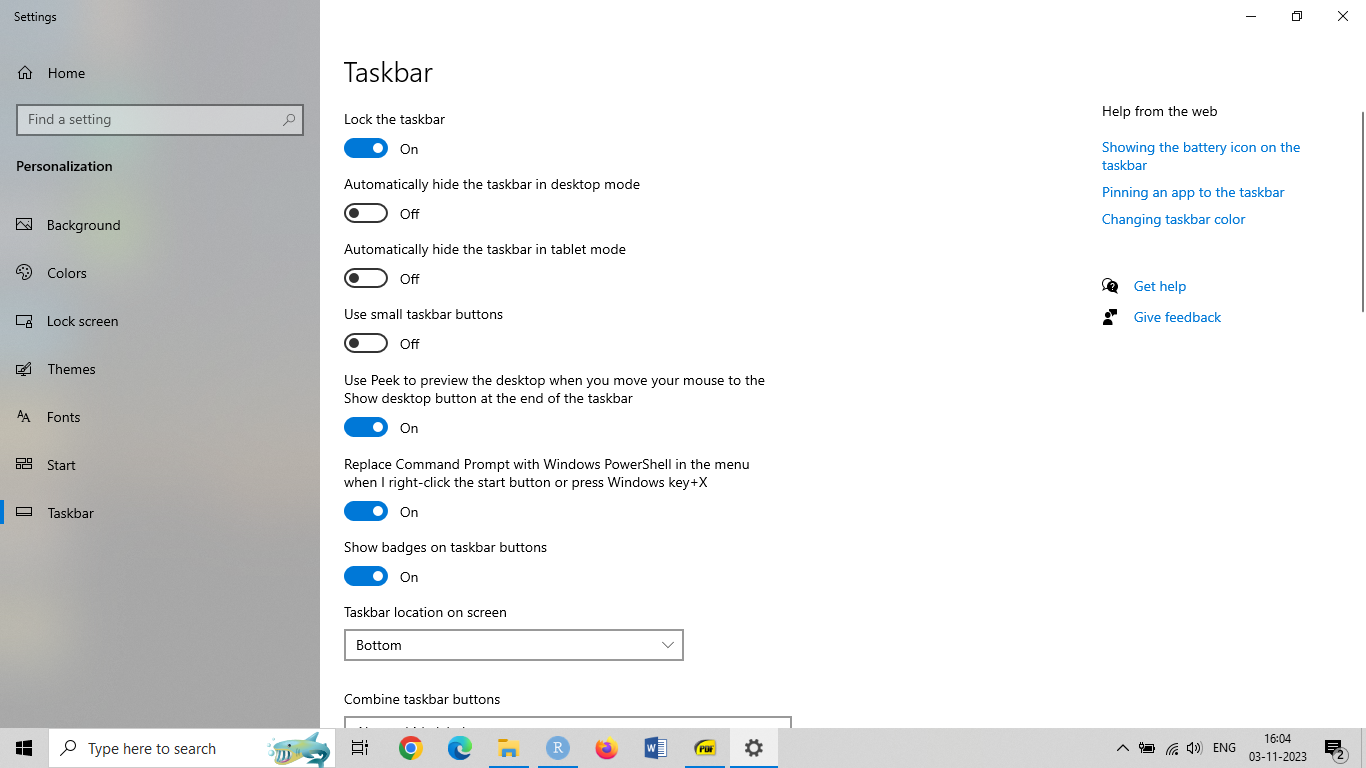
Using the Taskbar
The little strip at the bottom of the Windows desktop is called the
taskbar.
To open our favorite applications and documents
To switch between open windows
To add icons for your favorite programs to the taskbar.
Using Jump Lists
To display an icon’s Jump List, right-click the icon.
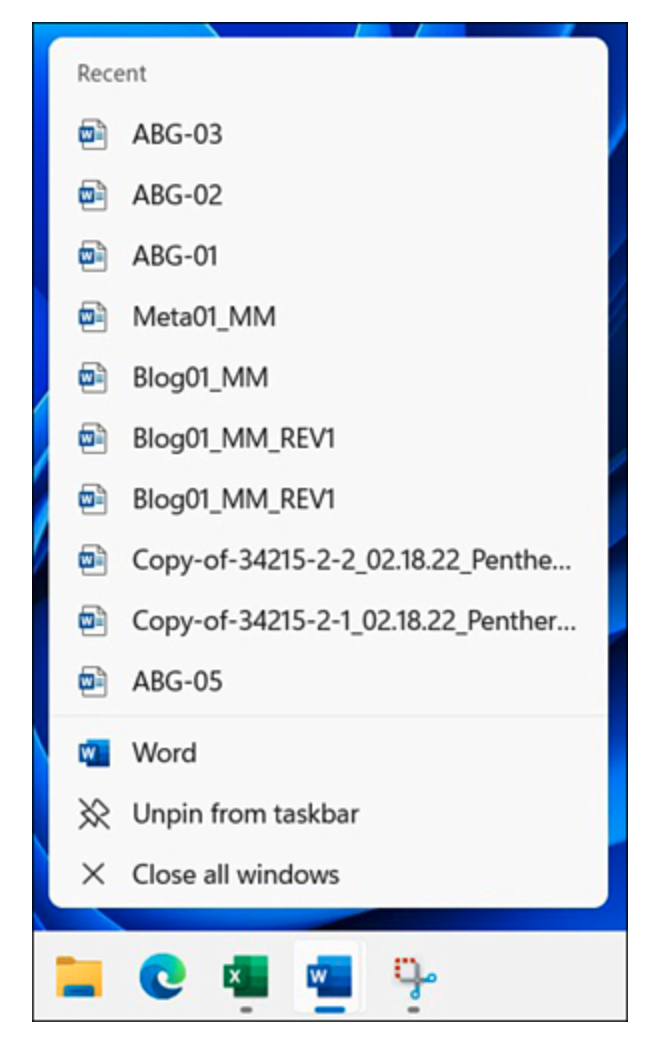
Most Jump Lists contain the following items:
The most recent documents opened in this application
A link to open a new instance of this application
An option to unpin this item from the taskbar (for shortcut icons)
An option to close all windows (for open-window icons)
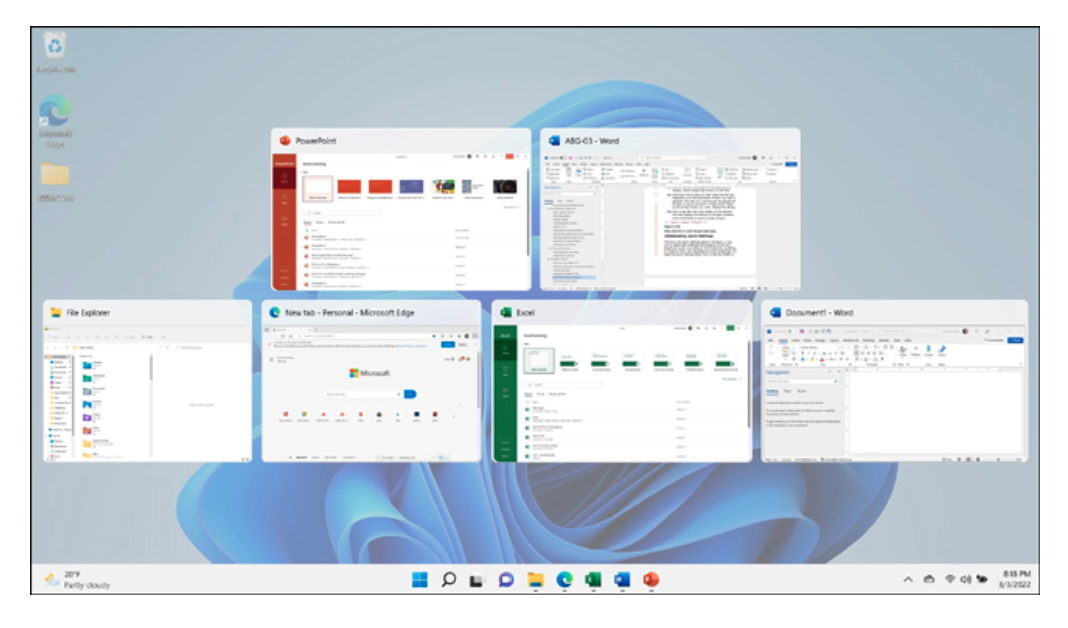
Switching Between Programs
Hold down the
Altkey and then press theTabkey repeatedly until the application window you want is selected.When you are at the window you want, release the
Altkey.
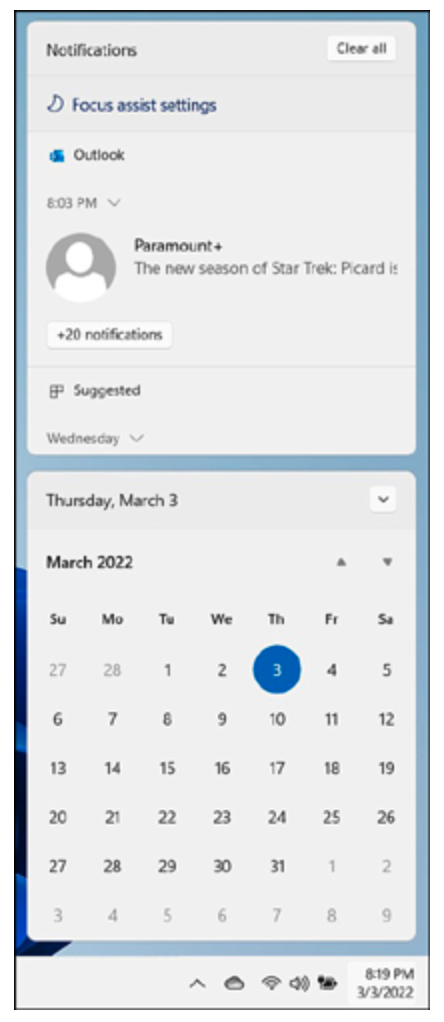
Adjusting Quick Settings
Click or tap one of the icons the middle of the notifications area on the taskbar.

Viewing Notifications
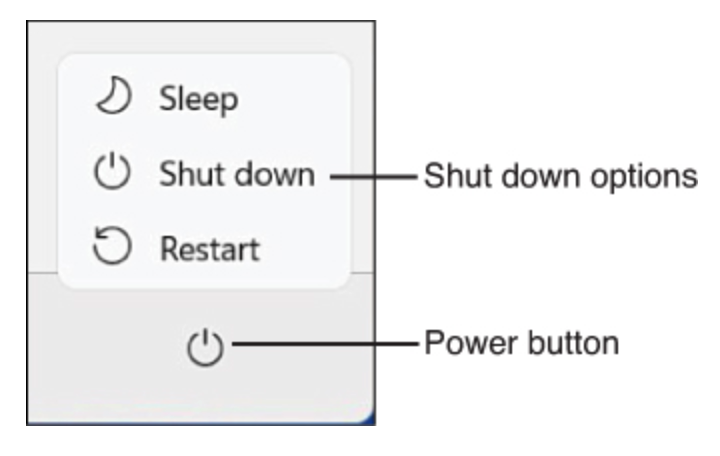
Shutting Down Windows & PC
You always want to turn off things through the official Windows procedure.
Understanding Files and Folders
Windows stores files in
folders.A folder is like a parent file; each folder can contain both files and additional folders.
The exact location of a file is called its
pathand contains all the folders leading to the file.
File Explorer Window
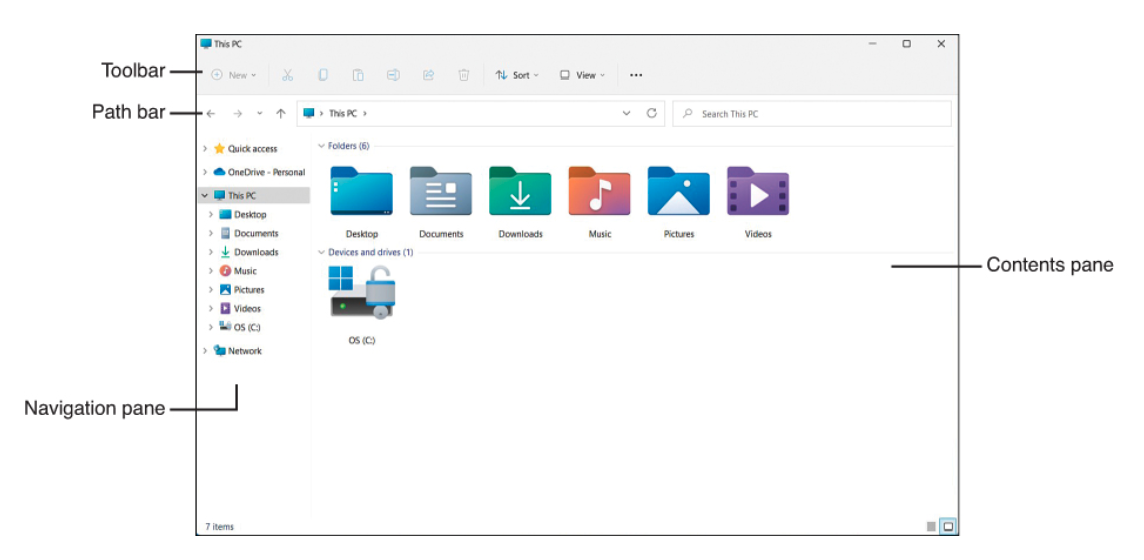
Navigation Pane
Quick Access:your most recent used folders, as well as several folders that are “pinned” to this section: Desktop, Downloads, Documents, Pictures, and Videos.OneDrivesection: it lets your folders stored on Microsoft’s OneDrive Internet-based storage service.Below
This PCsection provides access to all the disk drives and devices connected to your computer.Networksection: to access all your networked computers.

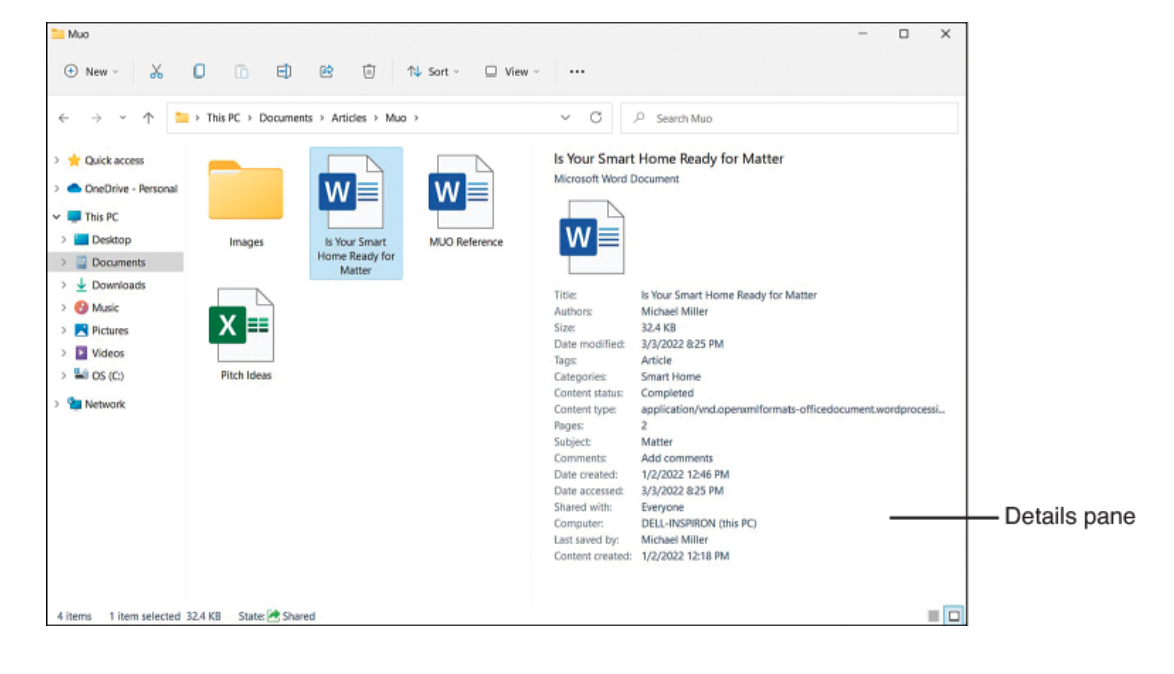
Display File Contents & Details
To display the Details or the Preview pane, select View and then select either Details Pane or Preview Pane.
Viewing Files and Folders
To change the file view, click or tap View in the toolbar.
Tip
The Details view is better if you’re looking for files by date or size.

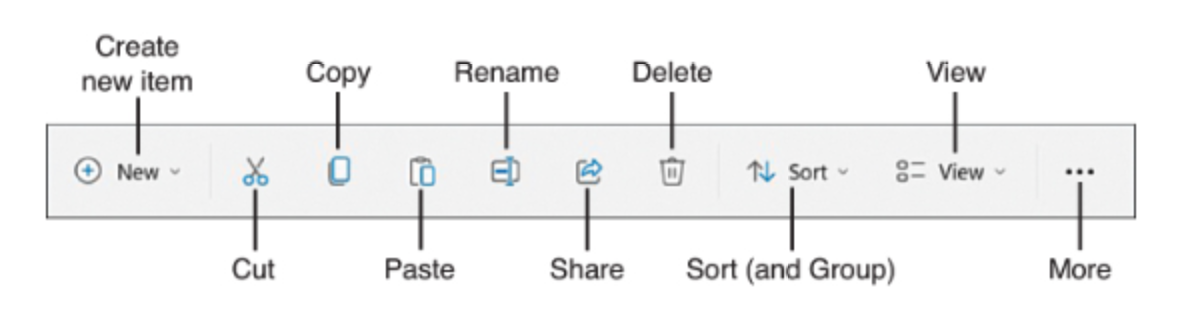
File and Folder Operations
Use the functions availabe on the File Explorer toolbar.
Working with the Recycle Bin
Recycle Bin is a special folder on your hard disk that temporarily stores all deleted items.
How to “undelete” or restore a file from the Recycle Bin?
Emptying the Recycle Bin
Double-click or double-tap the Recycle Bin icon on your desktop to open the Recycle Bin folder.
Click or tap the Empty the Recycle Bin button on the toolbar.
When the confirmation dialog box appears, click or tap Yes to completely erase the files; click or tap No to continue storing the files in the Recycle Bin.
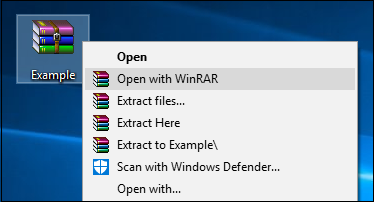
Work with Compressed Folders
Compressed folders(sometimes called zip files) take big files and compress their size, which makes them easier to copy or move

Compressing a File
![]()
Select the file(s) you want to compress. (Hold down the Ctrl button as you select multiple files.)
On the toolbar, select More (three dots), Compress to ZIP file.
Compressed folder is distinguished by a little zipper on the folder icon.
Extracting Files from a Compressed Folder
The process of decompressing a file is actually an extraction process.
Copy Files to Another Computer
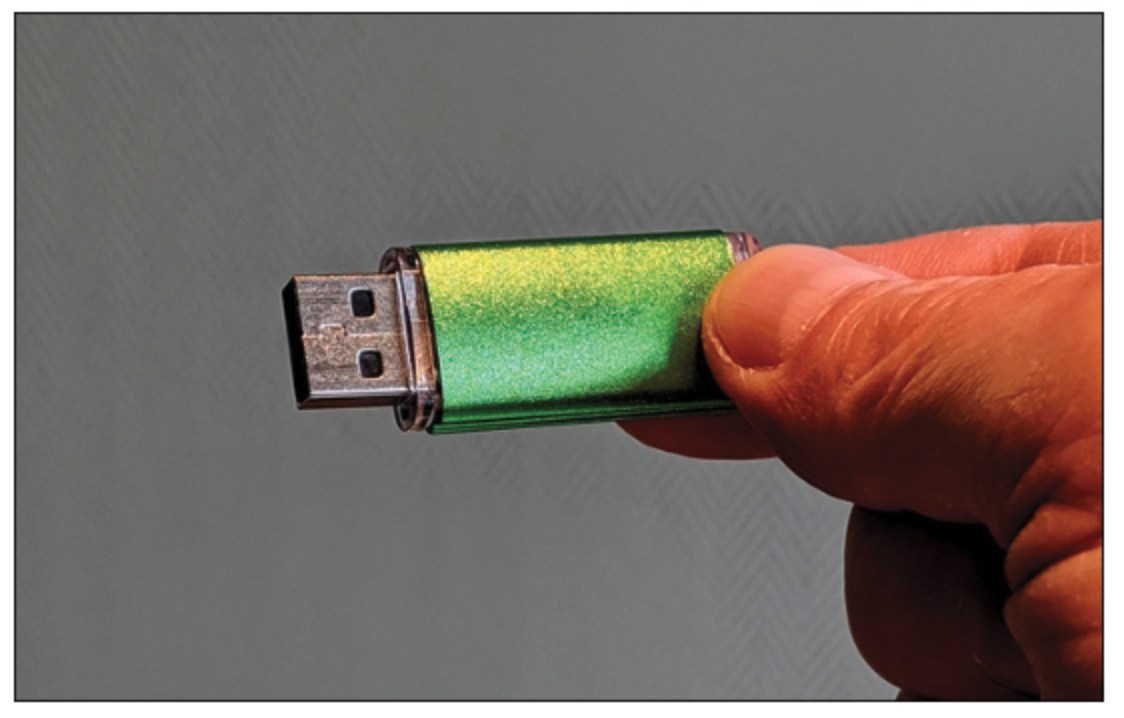
The most popular type of portable drive today is the USB drive (sometimes called a pen drive or flash drive or thumb drive).
Access OneDrive from File Explorer
From within File Explorer, click or tap OneDrive in the navigation pane. This displays all your OneDrive files and folders.
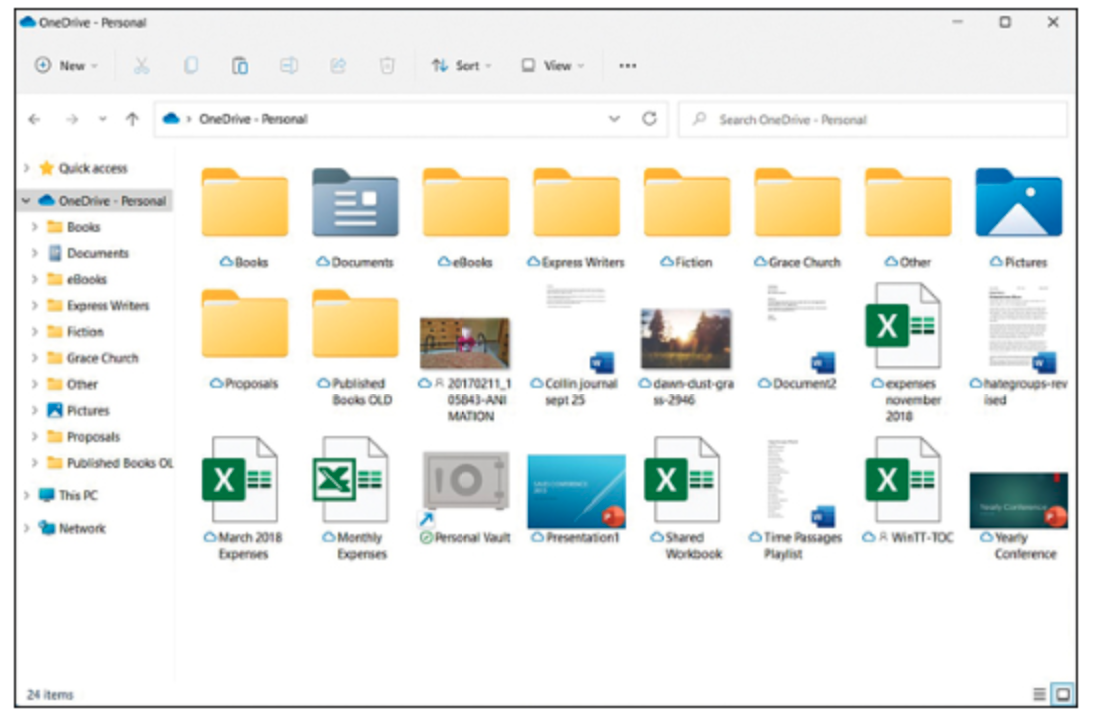
Using Microsoft OneDrive
From within any web browser, go to onedrive.live.com and either sign into an existing account or sign up for a new one.
Note
- Microsoft gives you 5GB of storage in your free OneDrive account
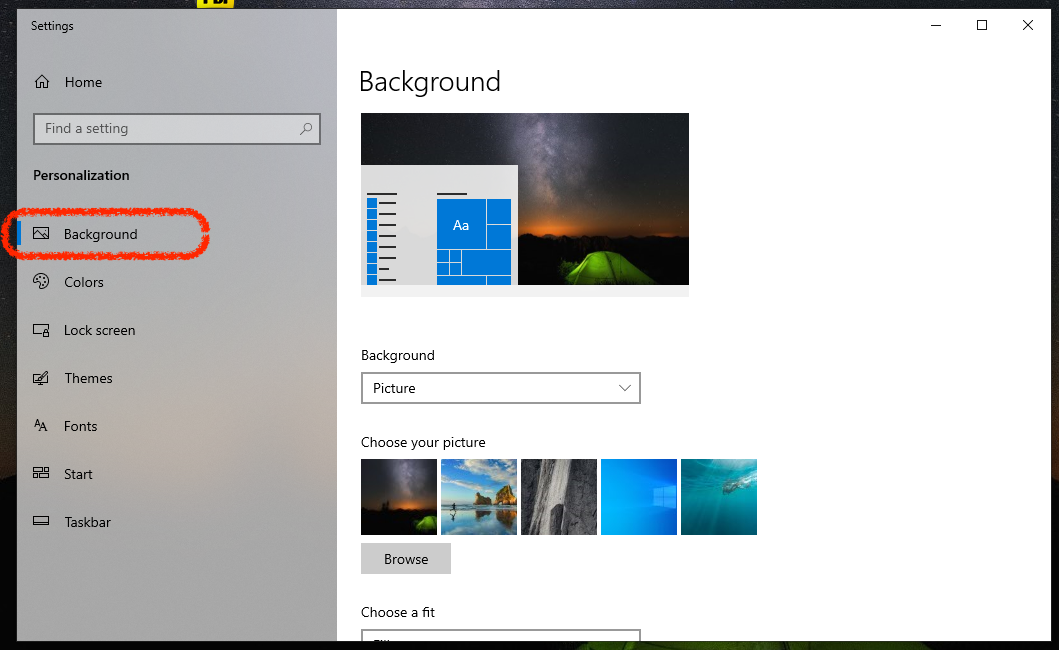
Change desktop background
Default picture | Your favorite picture | Any solid color
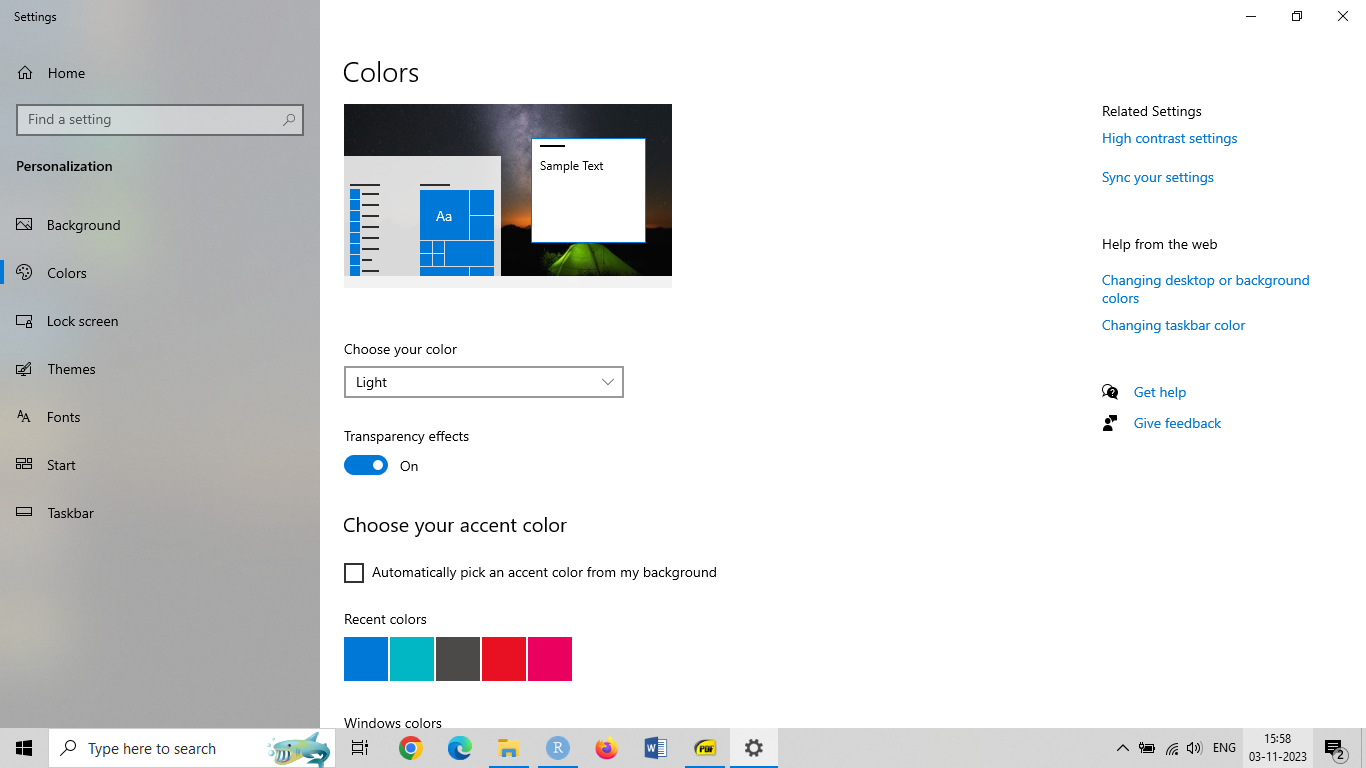
Light or dark mode
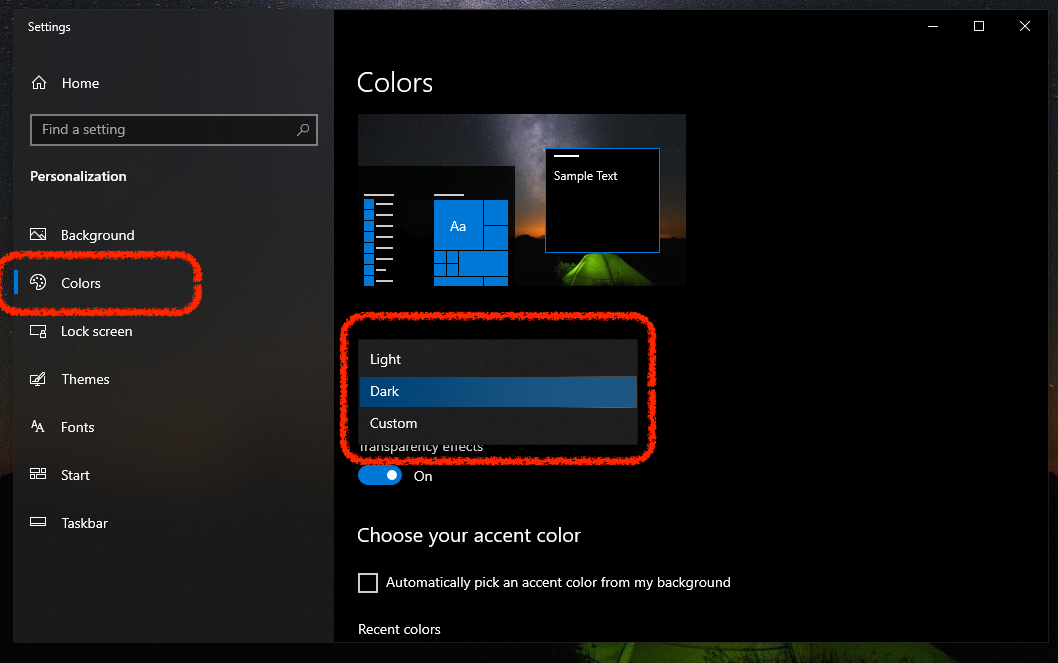
Choosing an accent color
Color for window borders and title bars
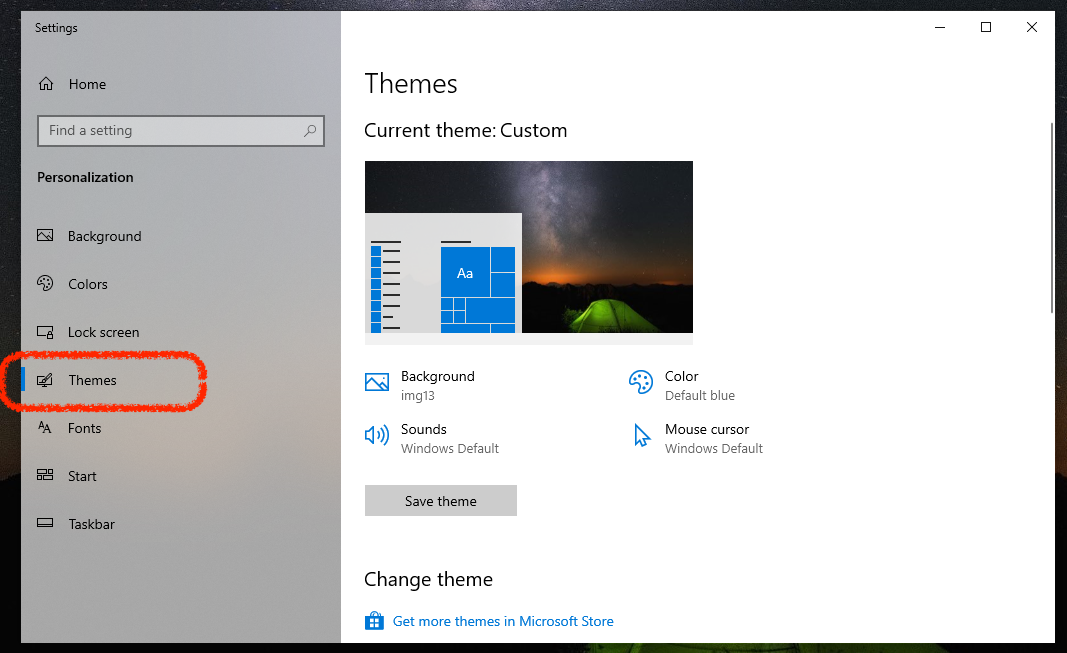
Chossing a Windows theme
Customize the Start menu

Customize the Taskbar
Personalize Lock Screen
Change background | Display slideshow
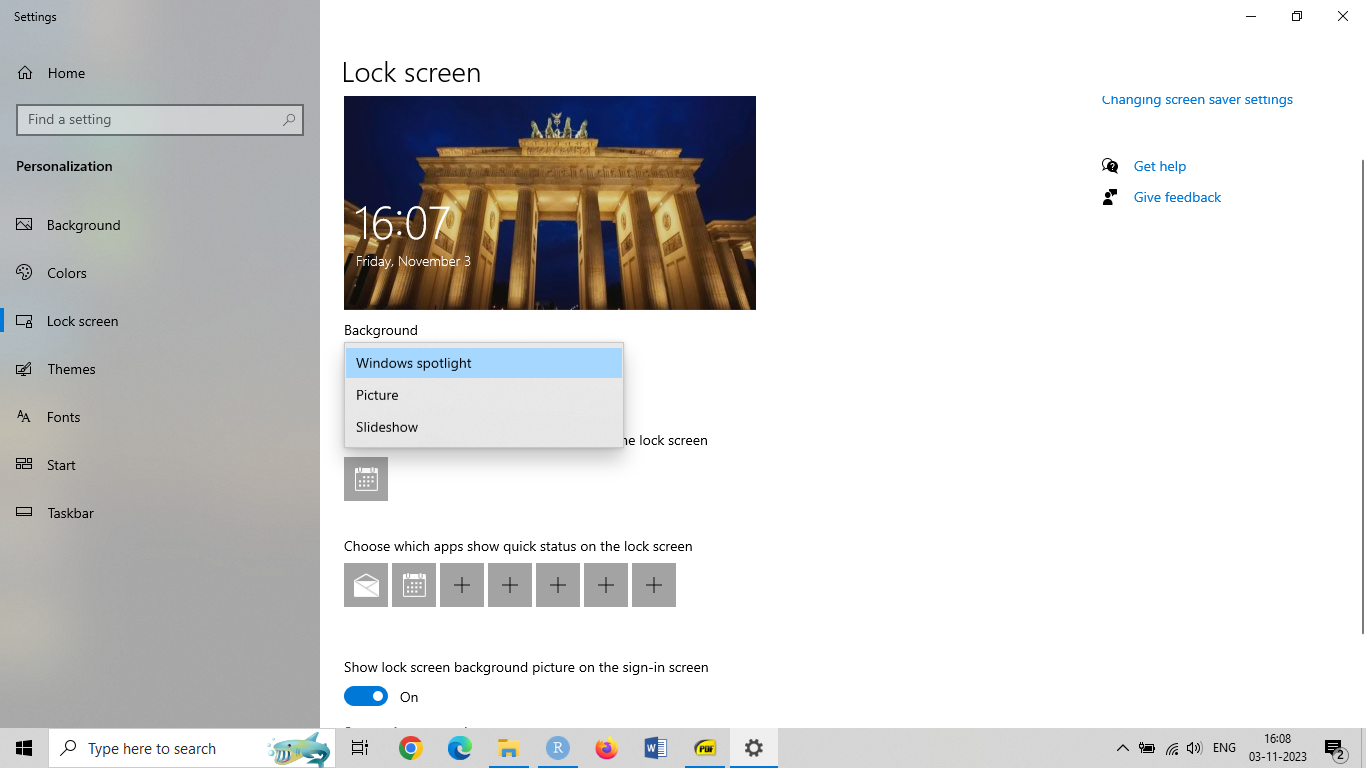
Lockscreen
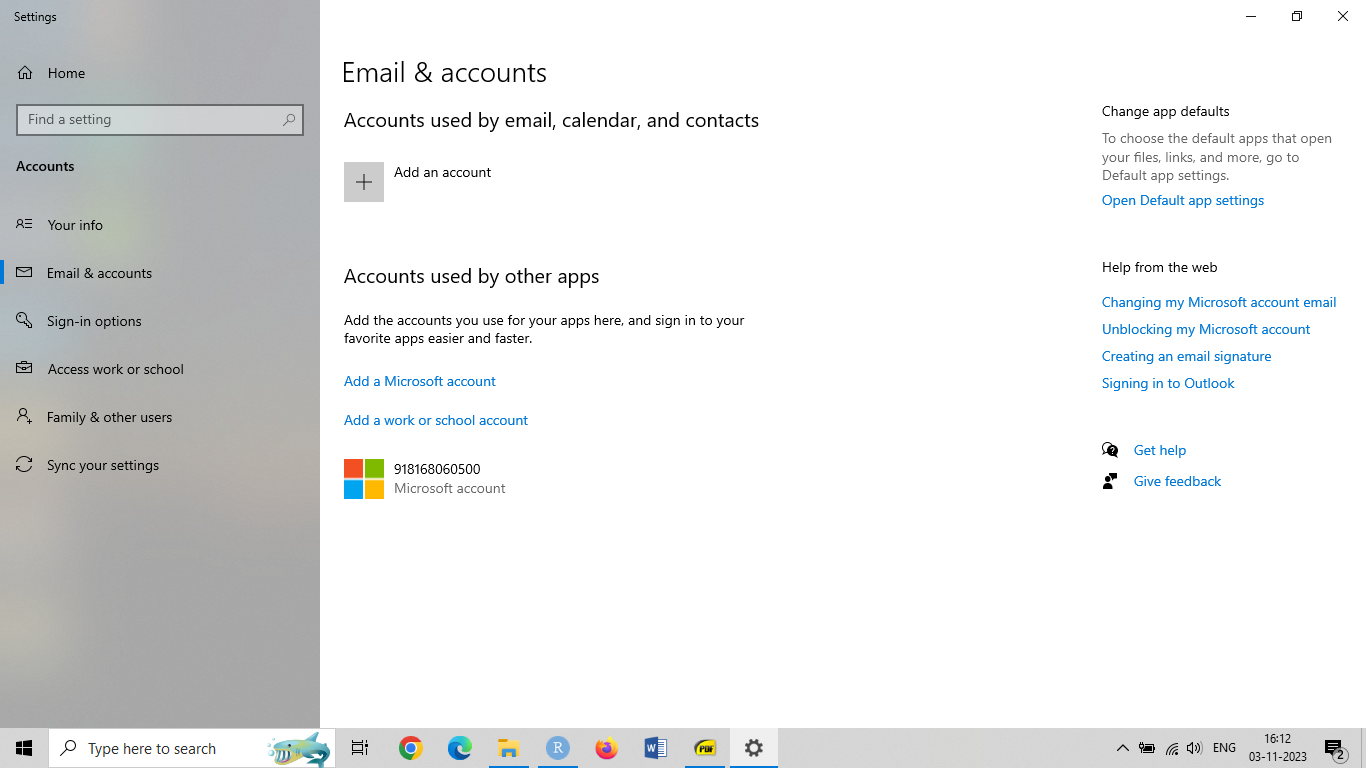
Change Account Picture

Additional User Accounts
Create new user account | Switching Users | Signing out
Windows Settings
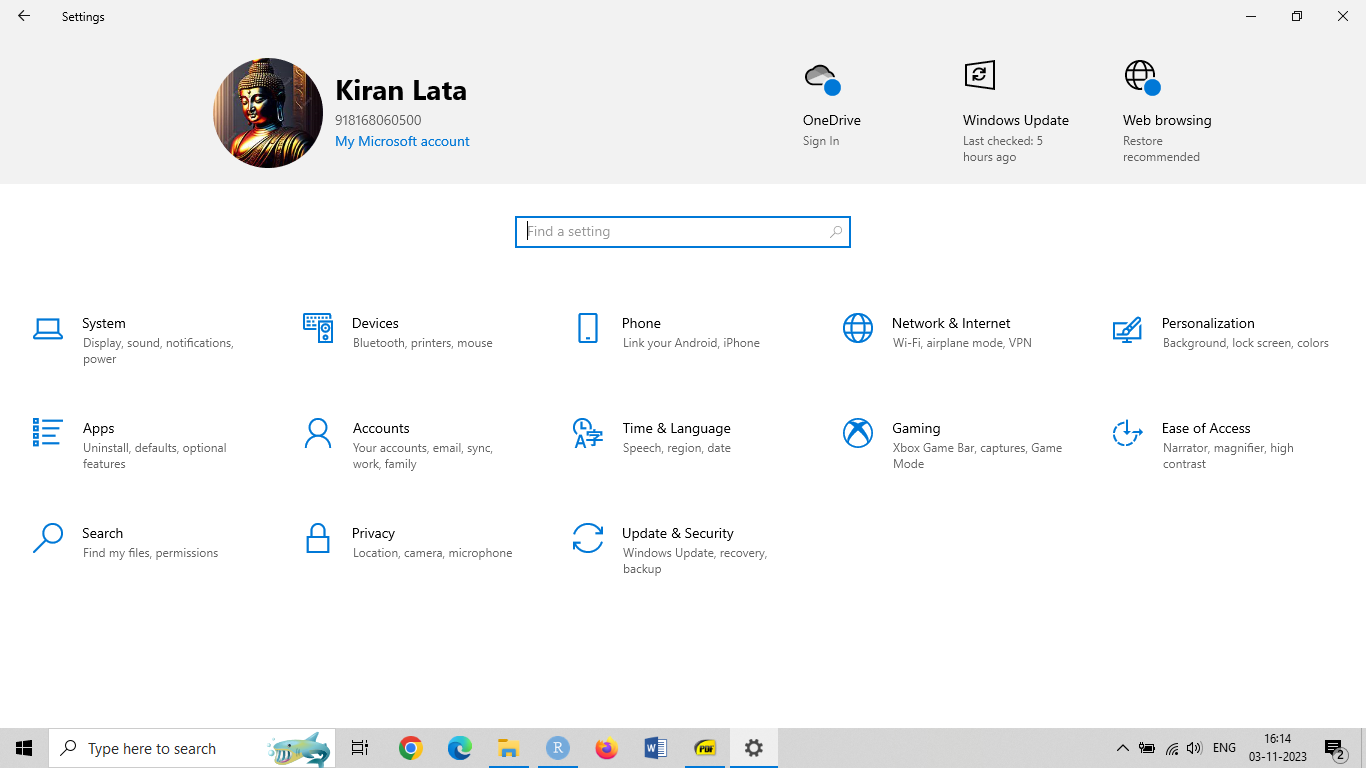
System Settings

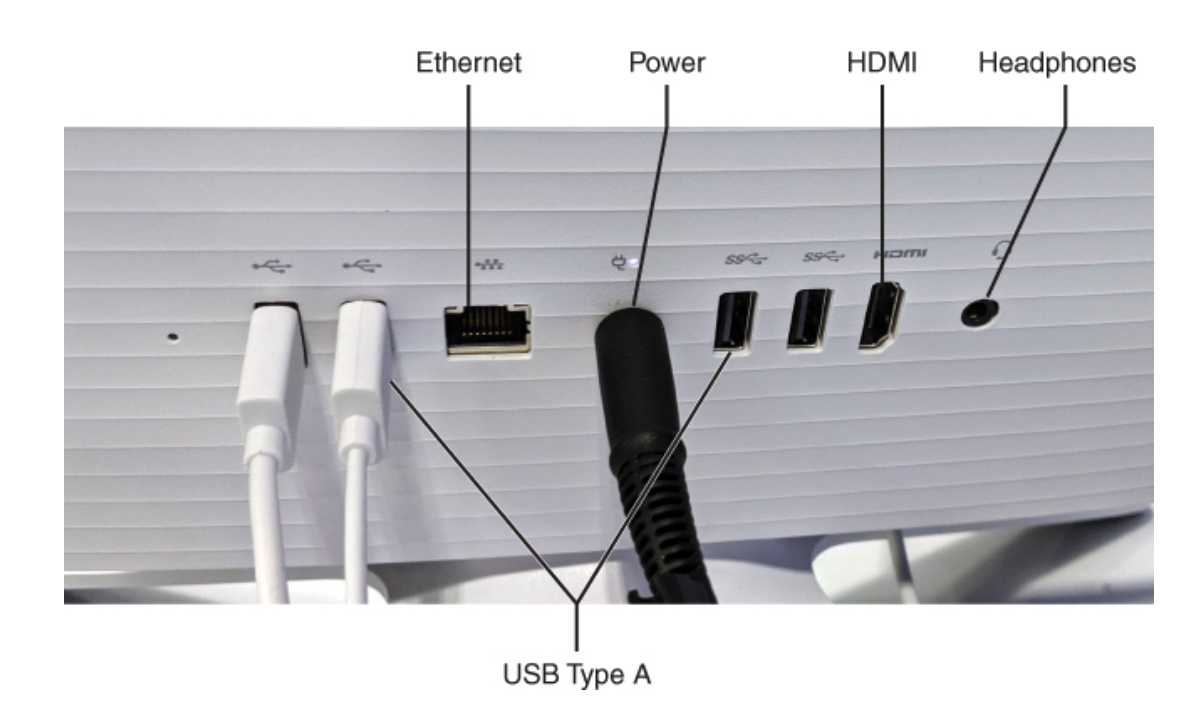
Understanding Ports
A port is simply an interface between your PC and another device either internally or externally.
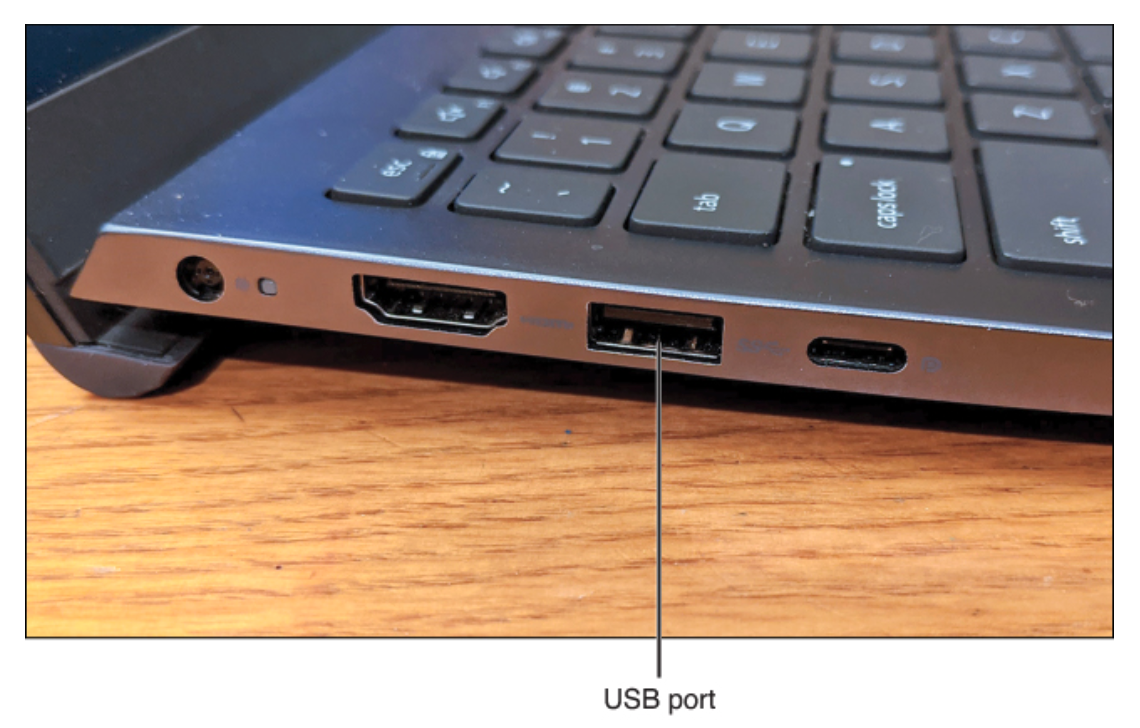
Understanding USB
The most common external connector today is the Universal Serival Bus.
Connect & use a printer
Device Driver: It is a small software program that enables your PC to communicate with and control a specific device.

Connect protable devices
Gadgets that you use on their own but plug into your PC to share files – smartphones, digital cameras, and USB memory devices.
You can transfer files either from your PC to the portable device, or vice versa.
Connect your PC to your living room TV
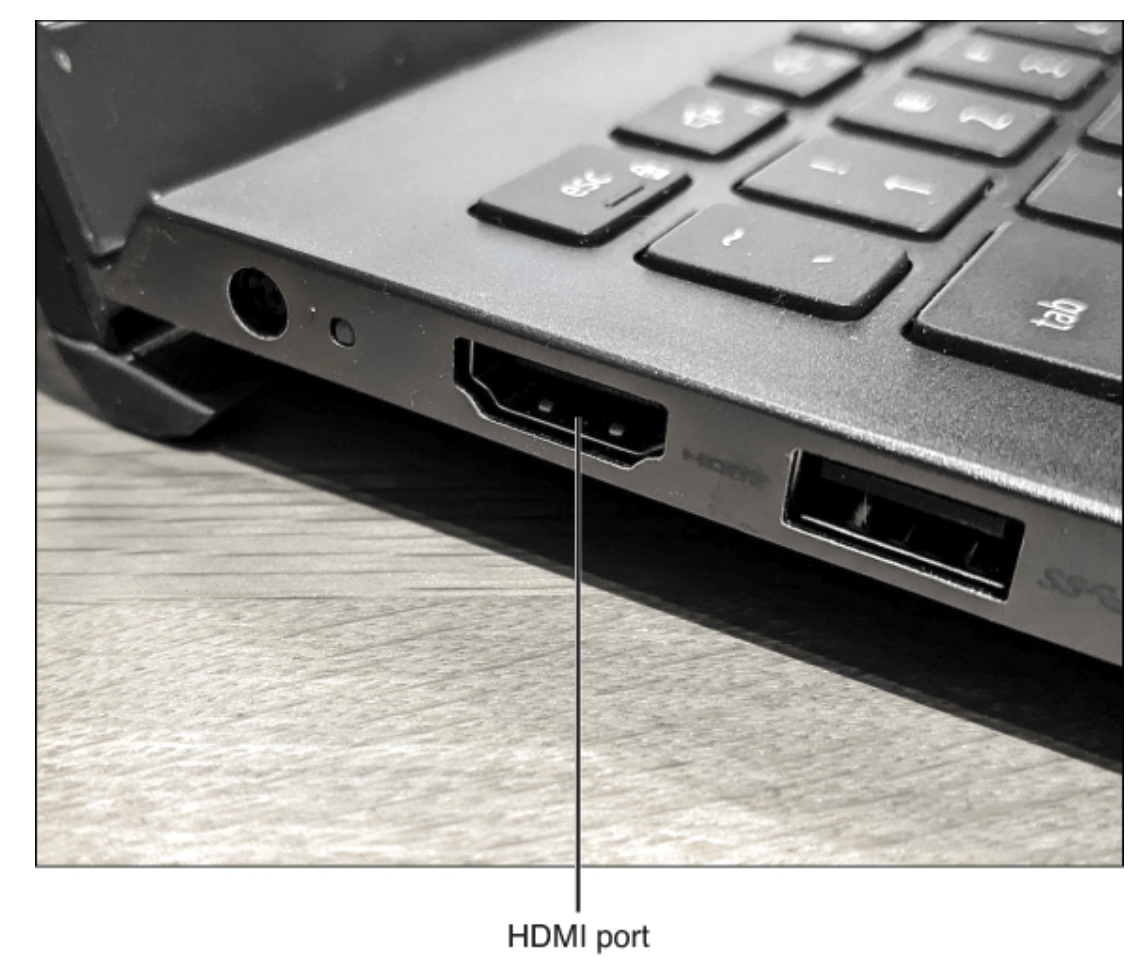
Connect via HDMI (High-definition multimedia interface)
Wirelessly mirroring your computer screen
PC and TV on same WiFi
Miracast technology
Understand external Storage

External hard disk and SSD drives let you add extra storage capacity to your system—up to 16TB extra.
You can use an external drive to back up valuable data from your main internal drive.
Also available are online backup services, which back up your data over the Internet.
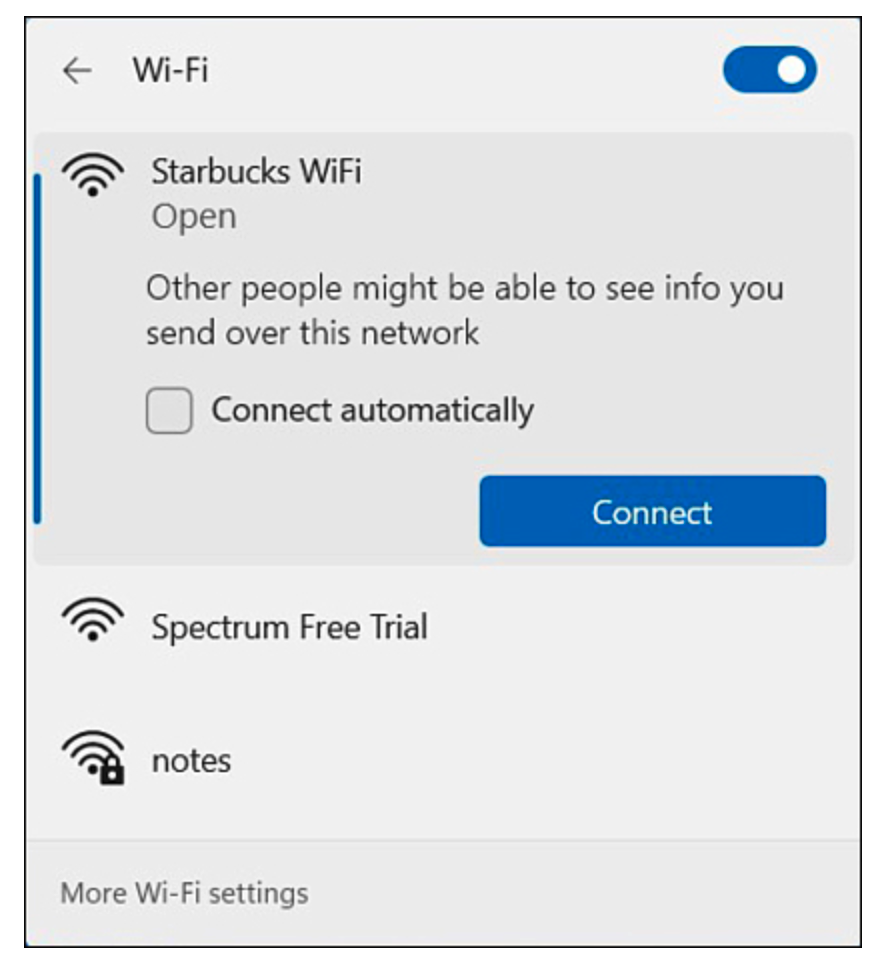
Wireless network
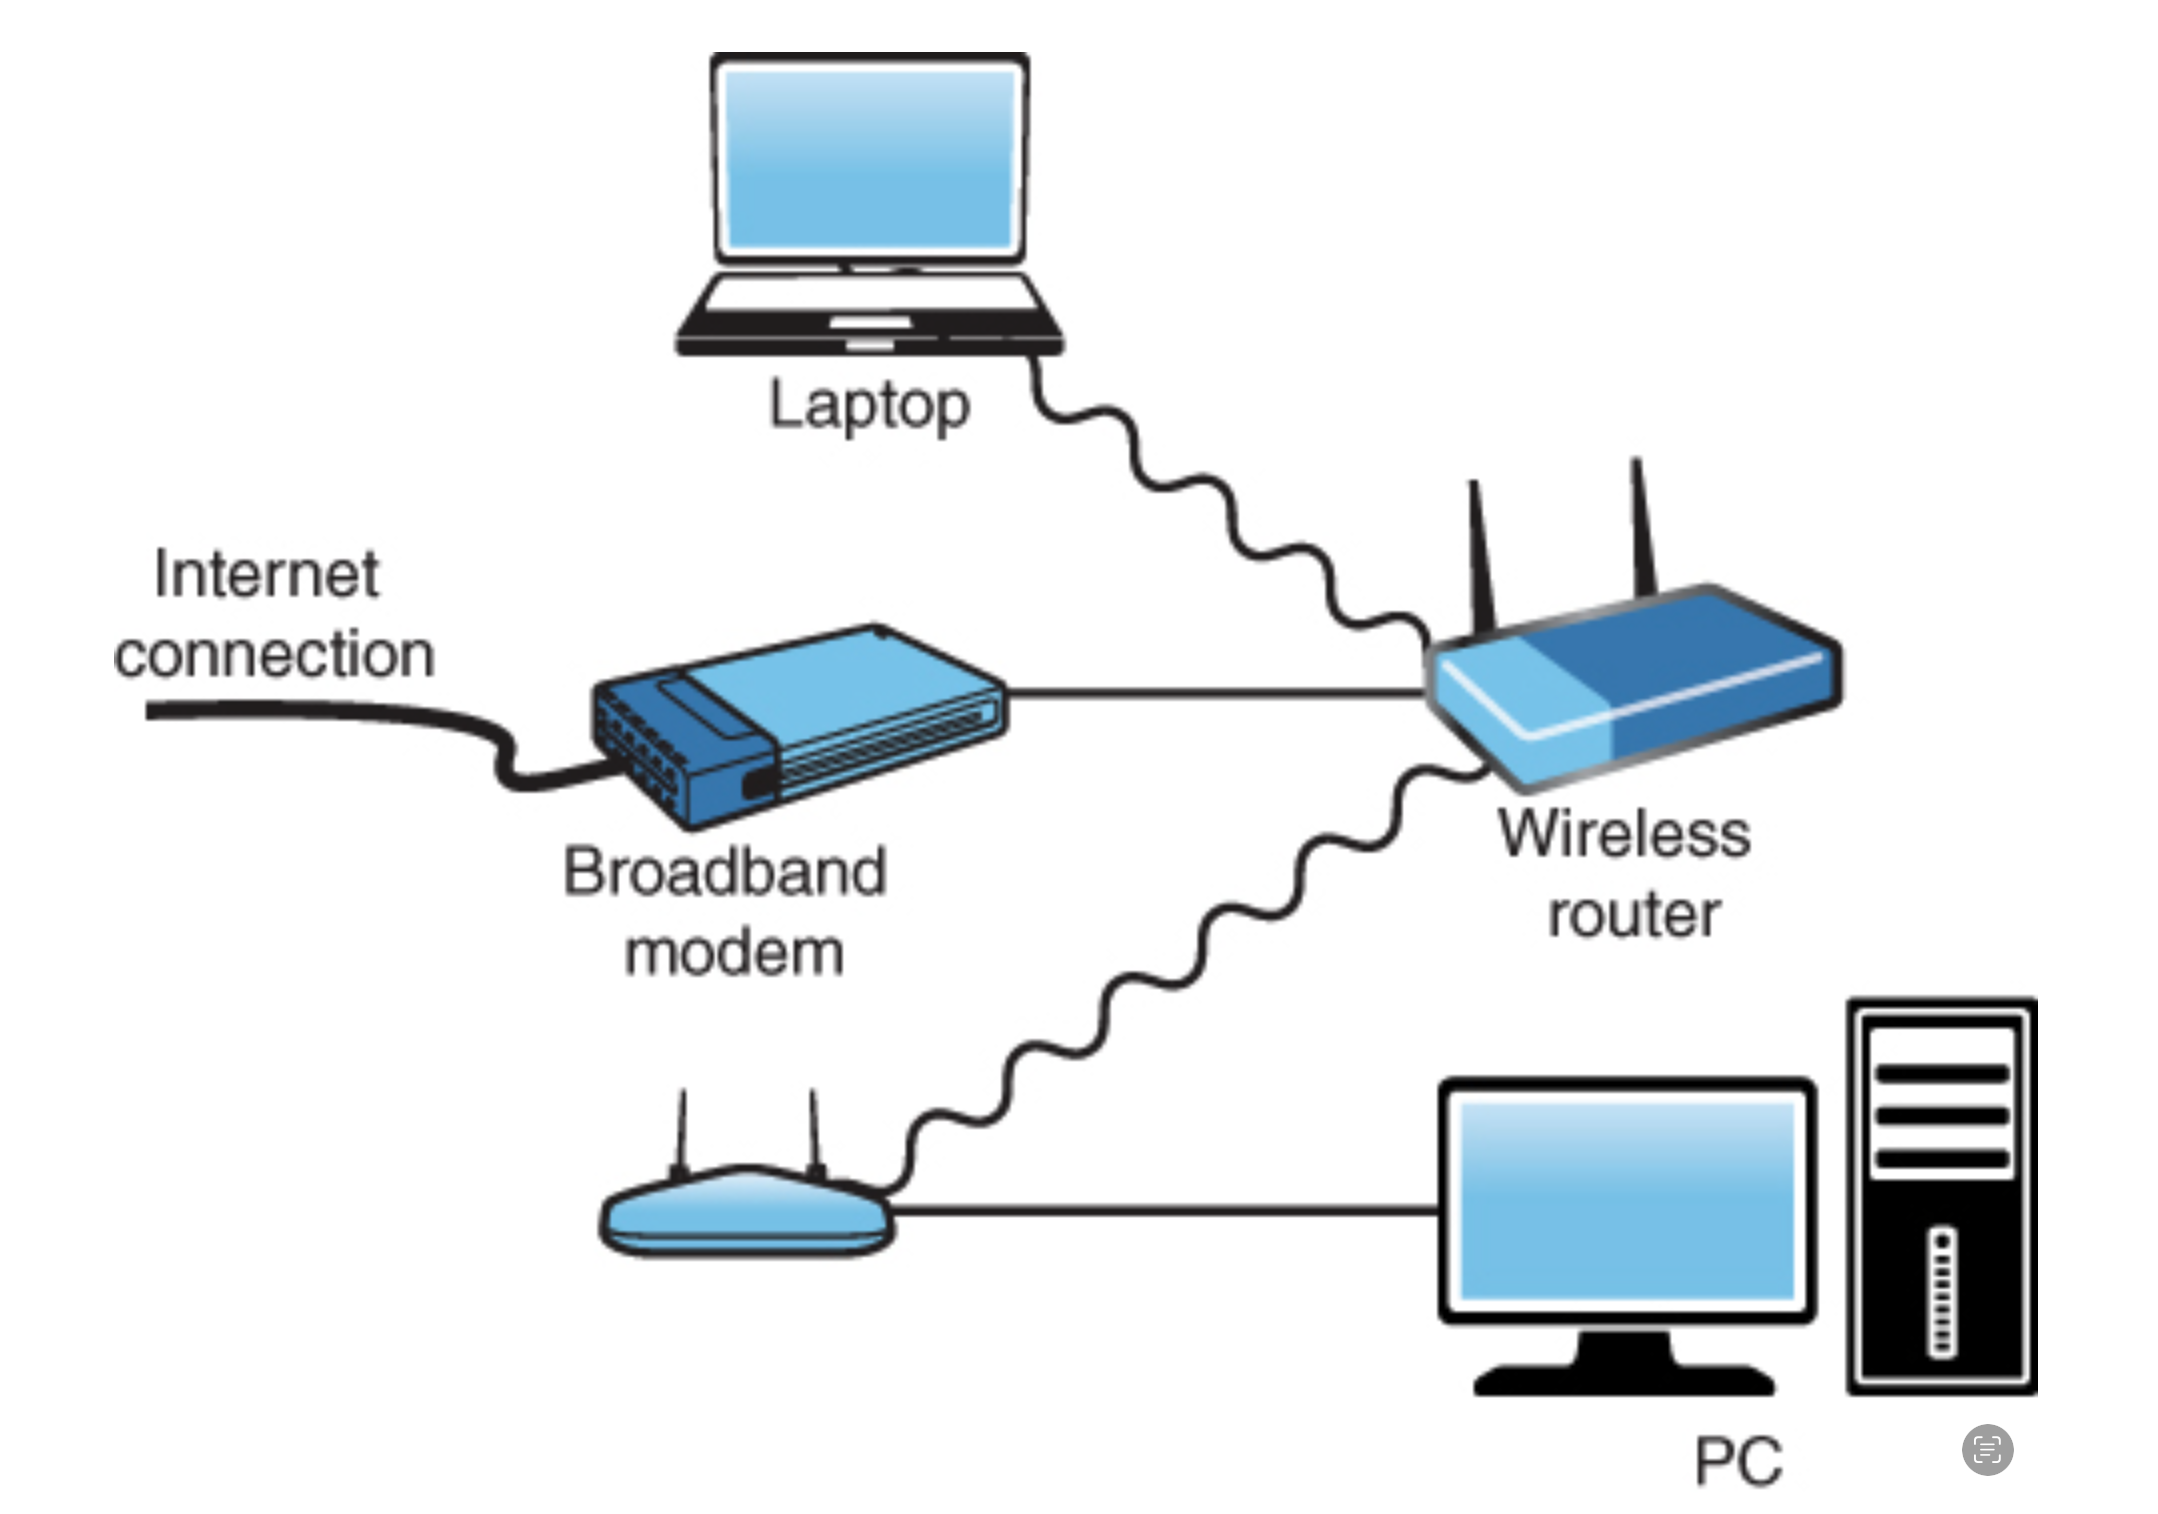
Connect to a Public Wi-Fi
Hotspot: A hotspot is a public place that offers wireless access to the Internet using Wi-Fi technology. Some hotspots are free for all to access; others require some sort of payment.
Web Browsers
“You surf the Web with a piece of software called a web browser.”

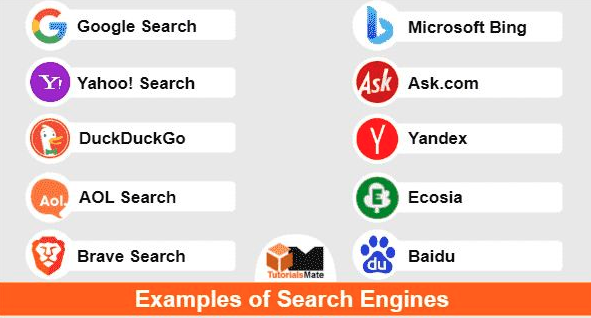
Search Engines
“a program that searches for and identifies items in a database that correspond to keywords or characters specified by the user, used especially for finding particular sites on the World Wide Web.”
![]()
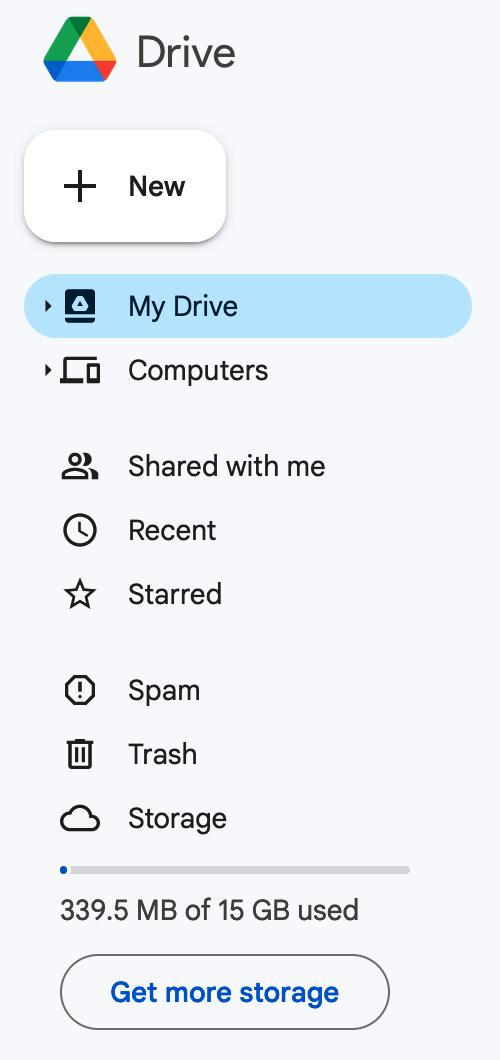
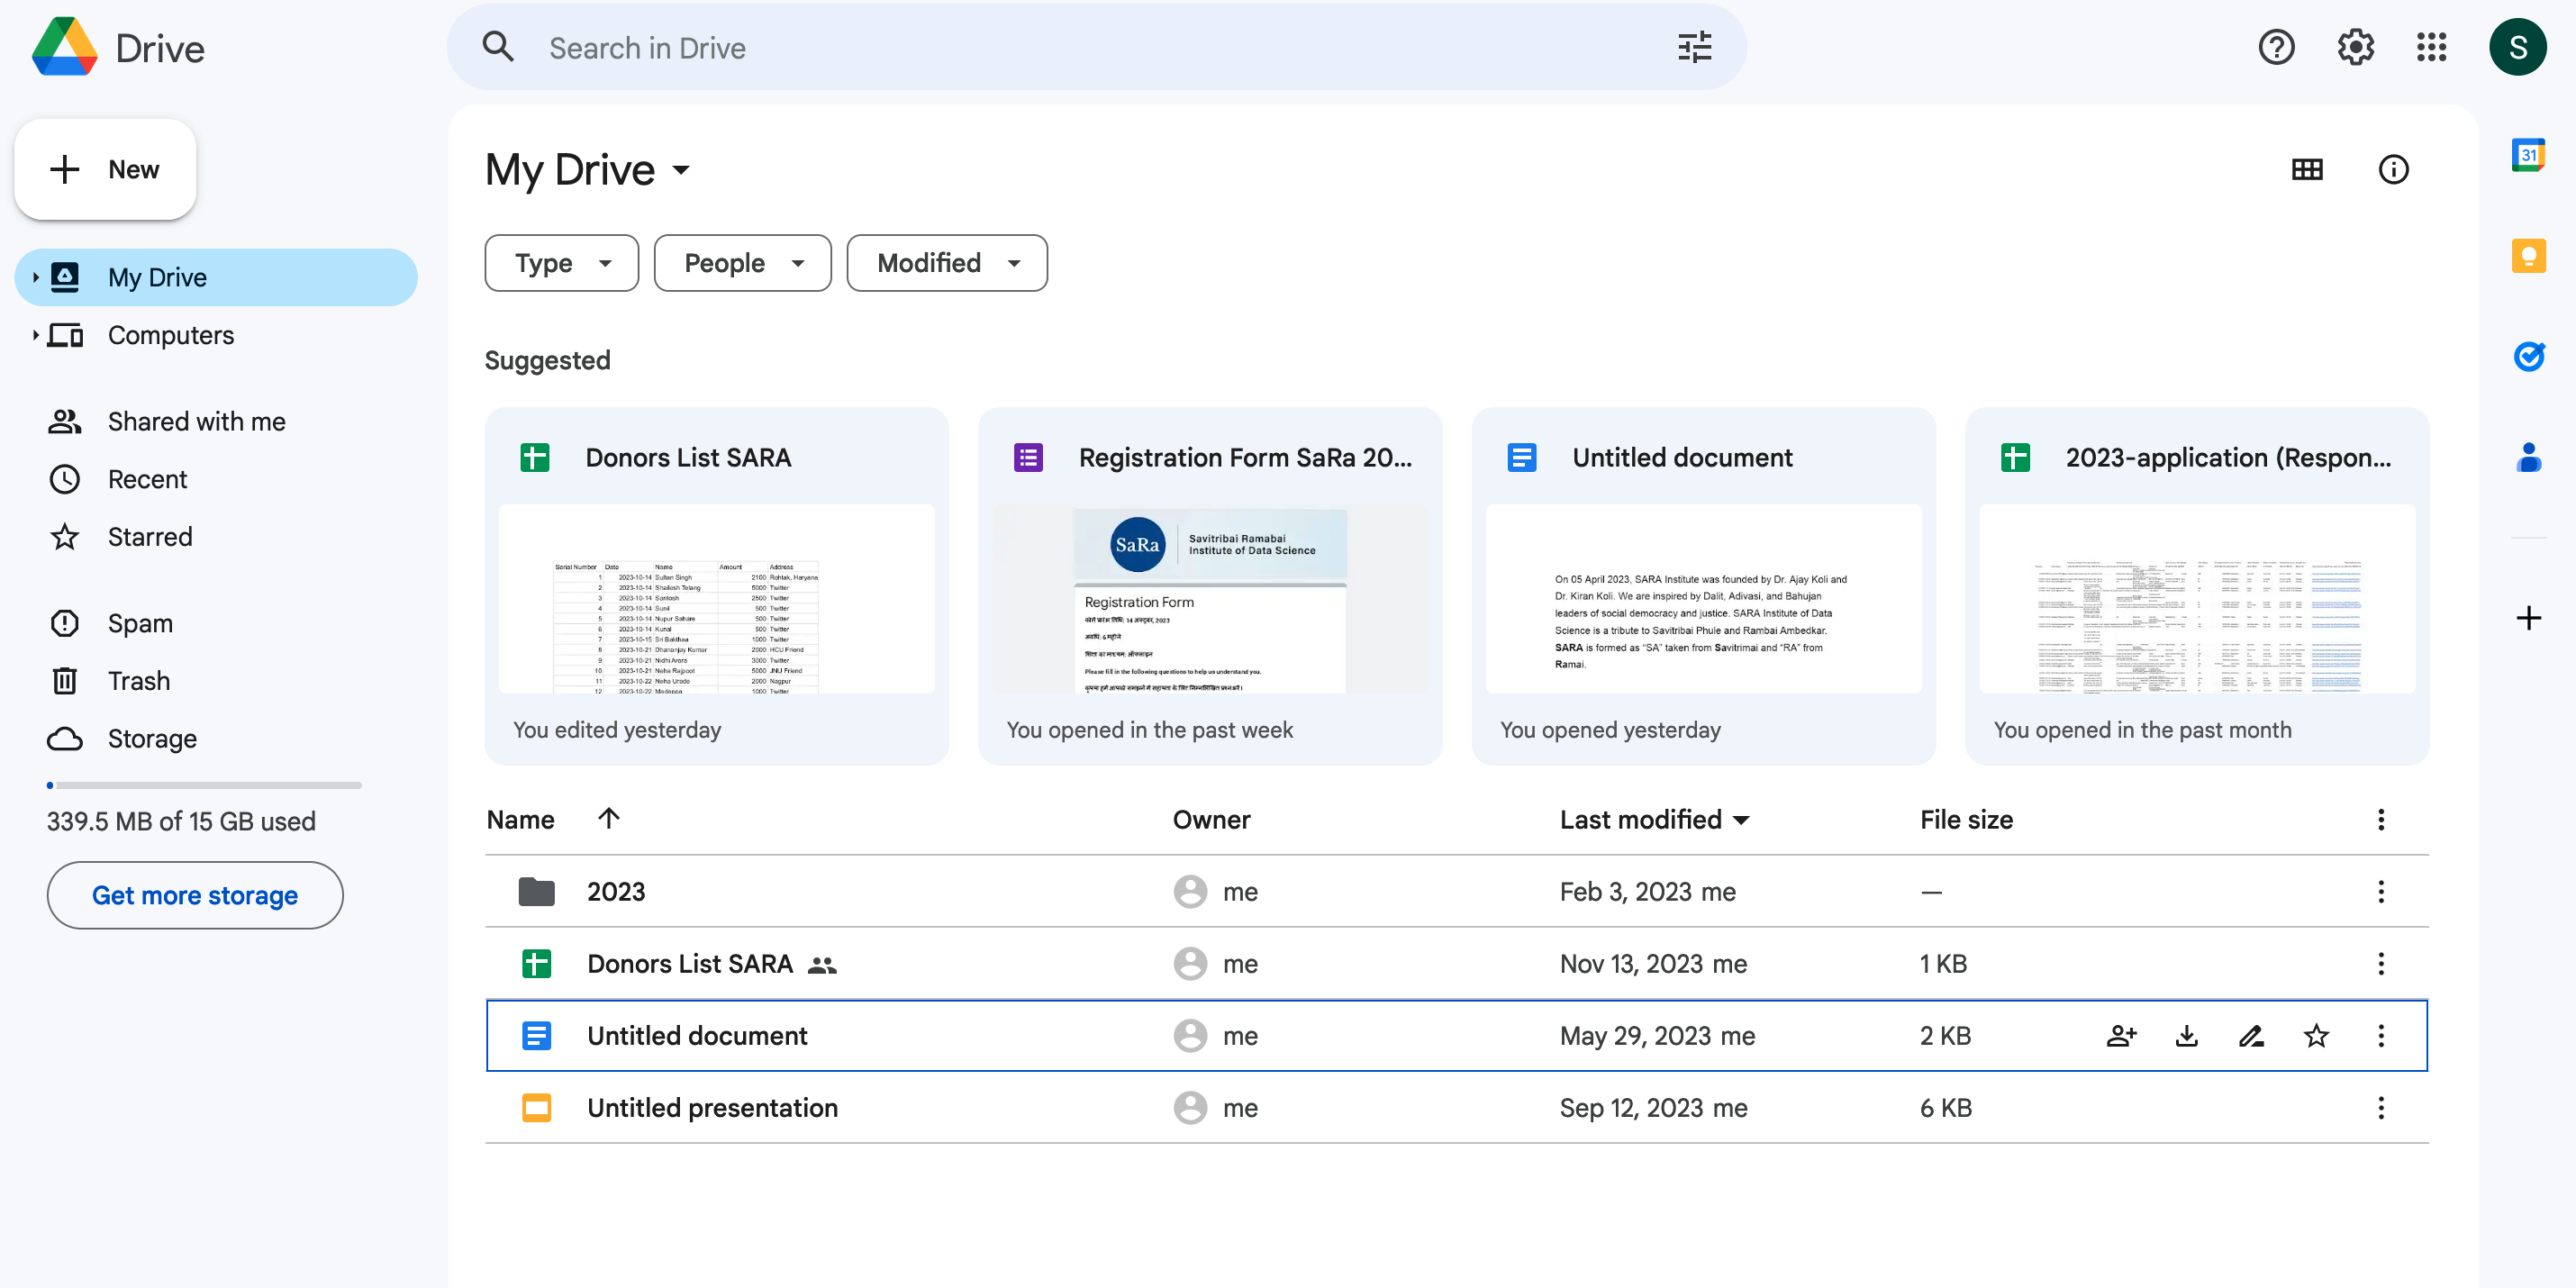
GOOGLE DRIVE
Google Drive: File Types

Google Drive: Options
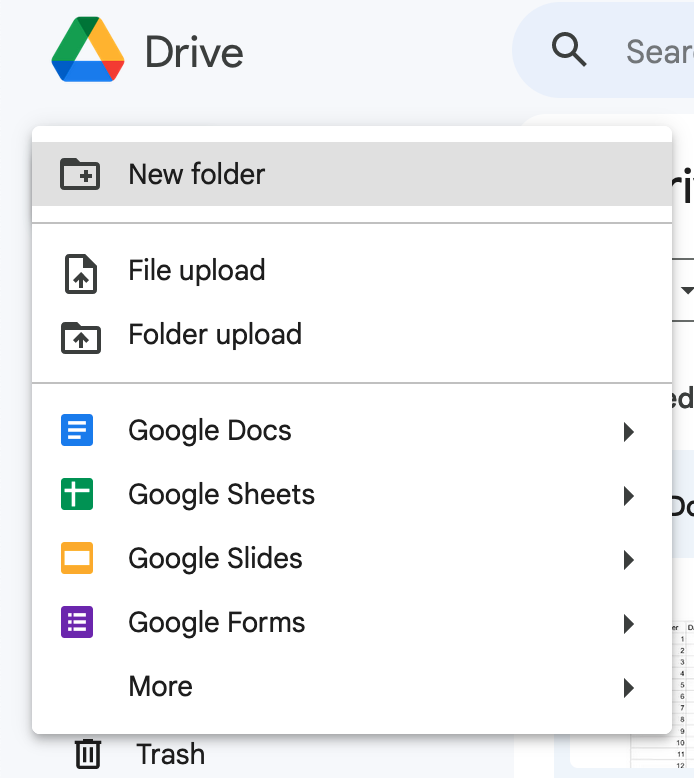
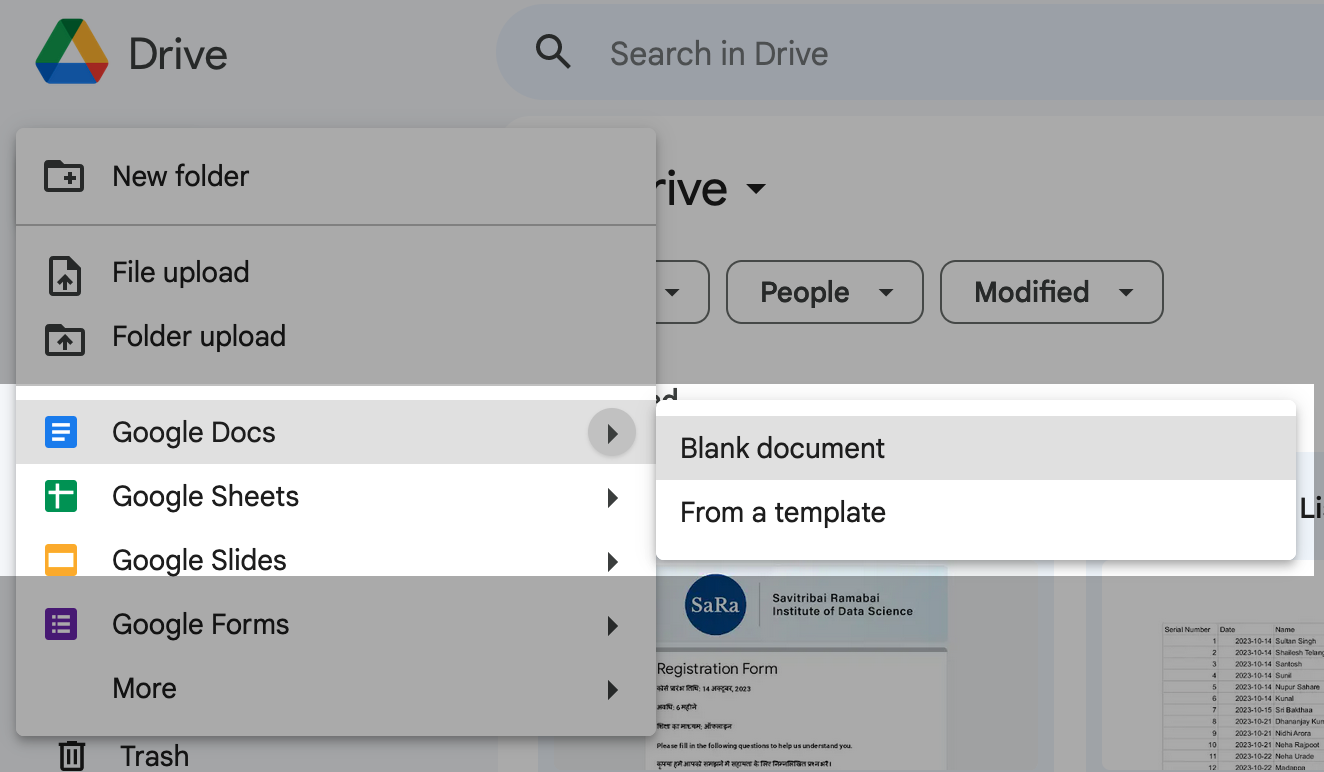
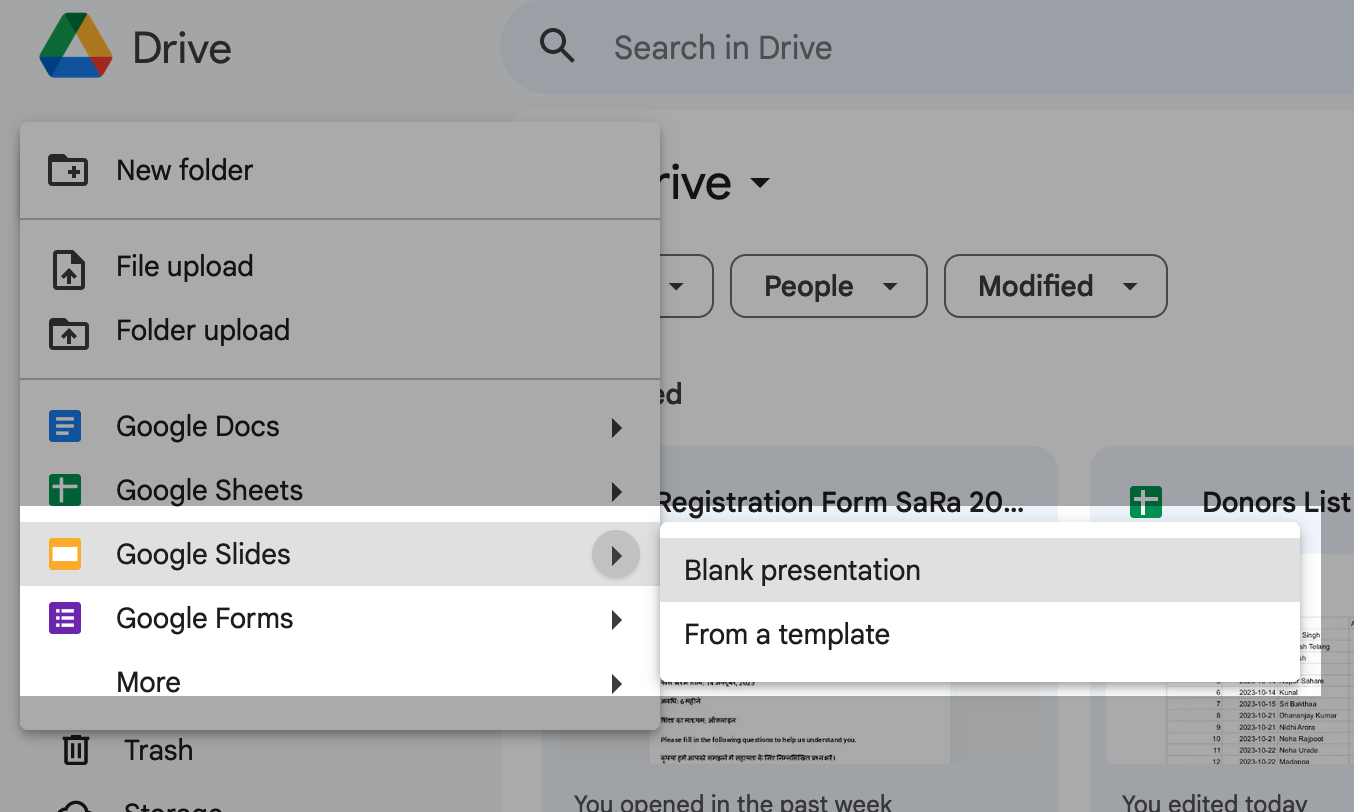
Google Drive: + New
Google Docs
Write reports, create joint project proposals, keep track of meeting notes, and more.

Google Docs: New
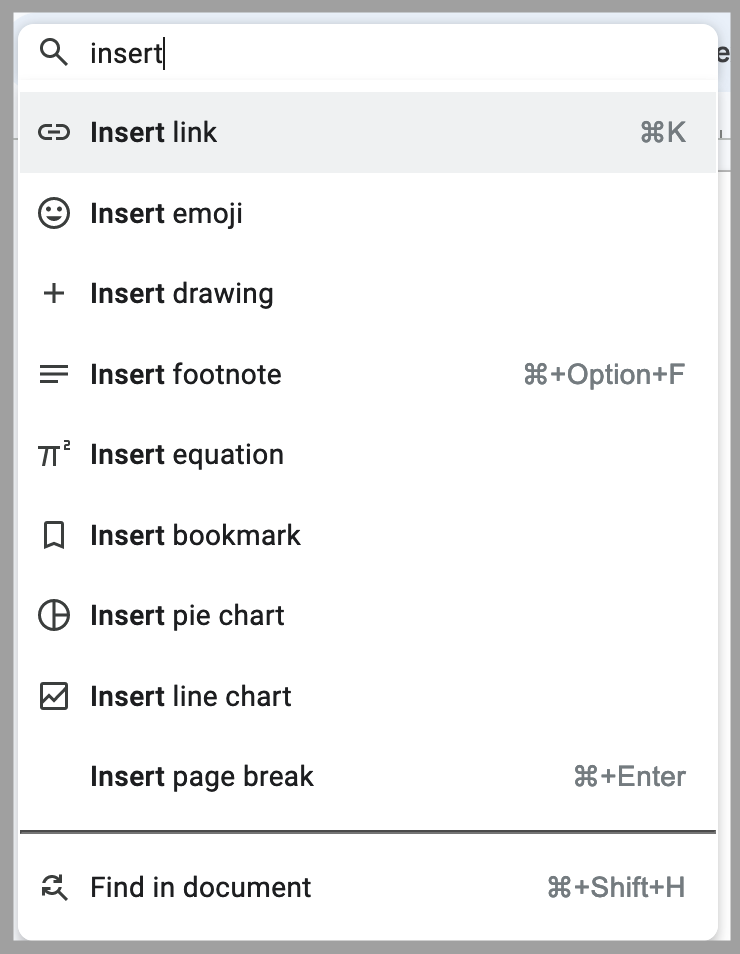
Google Docs: Edit Text

Google doc: search
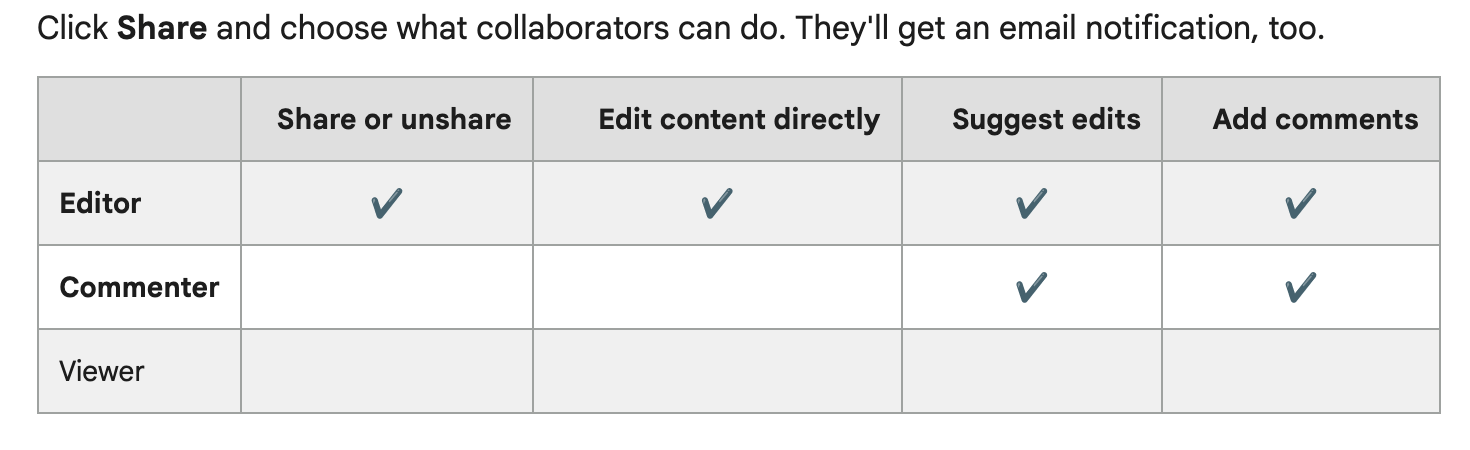
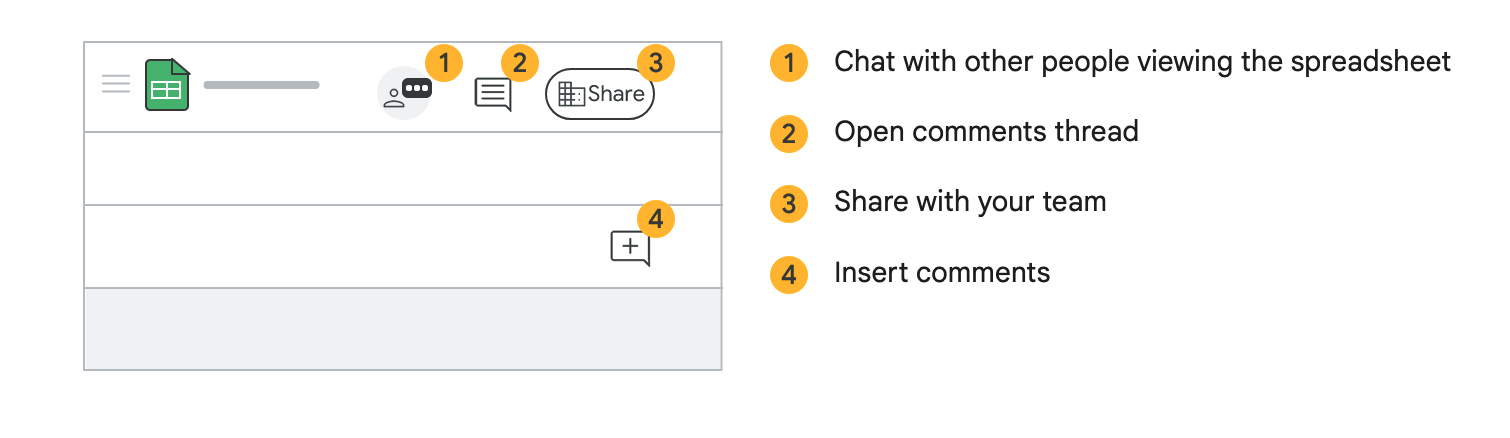
Google Doc: Share
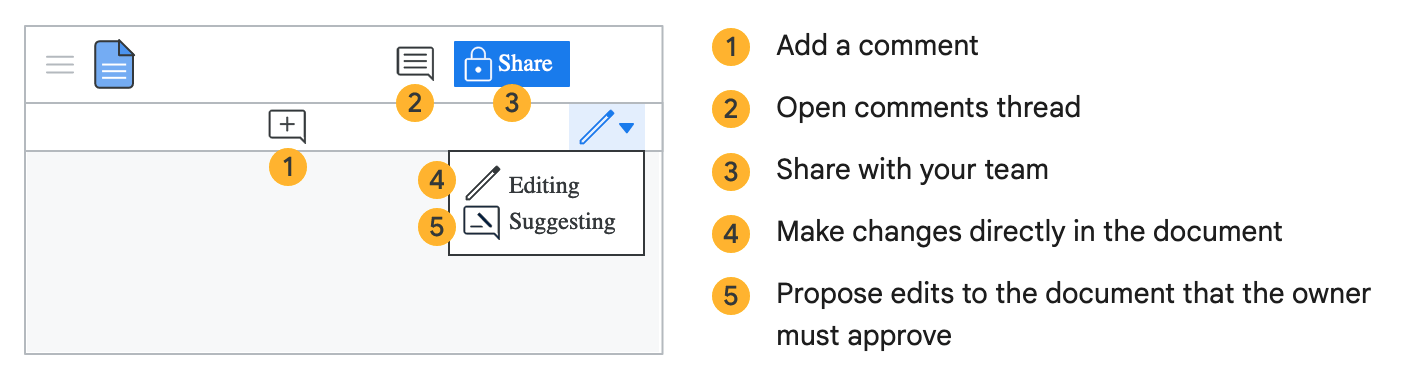
Google Doc: Collaborate
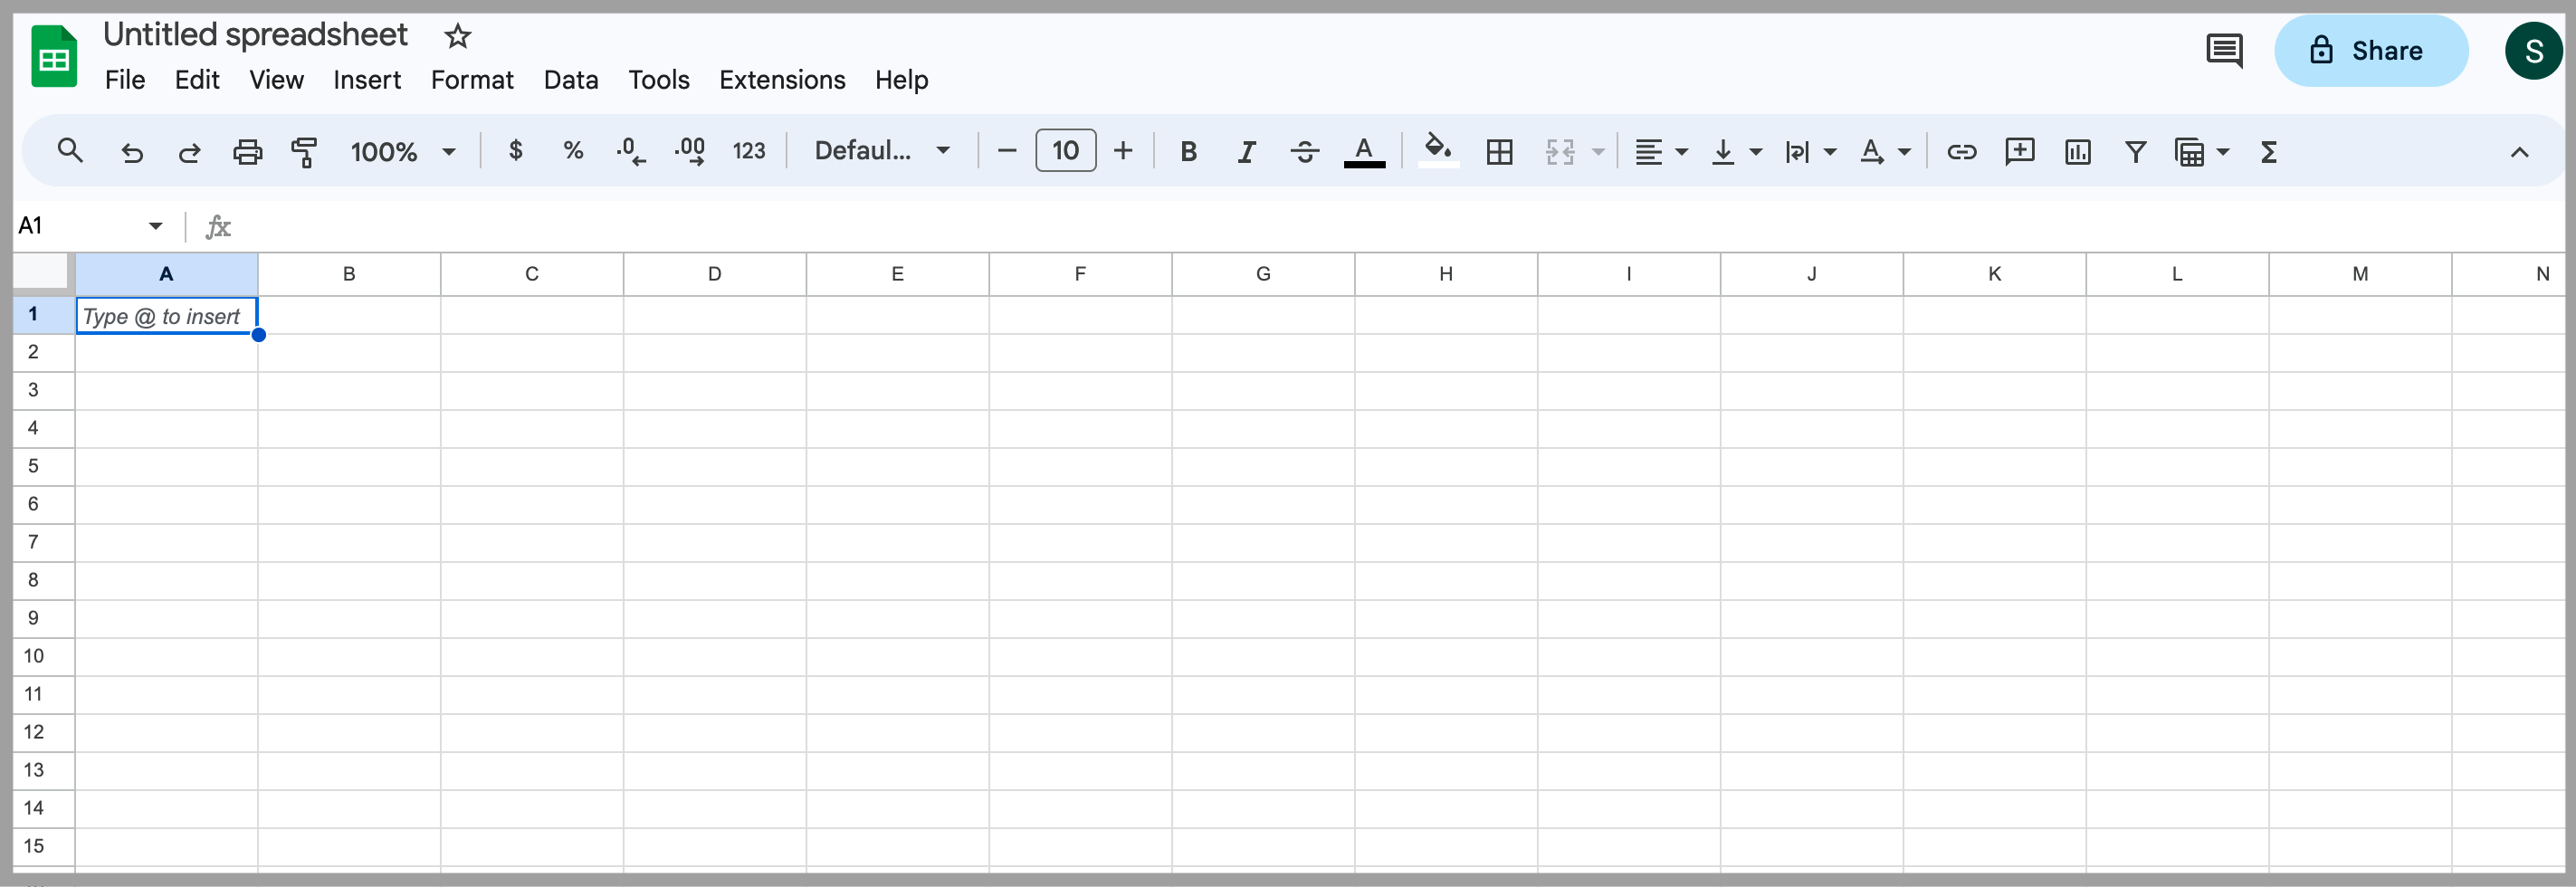
Google Sheet
Create spreadsheets for your data and collaborate with your colleagues.
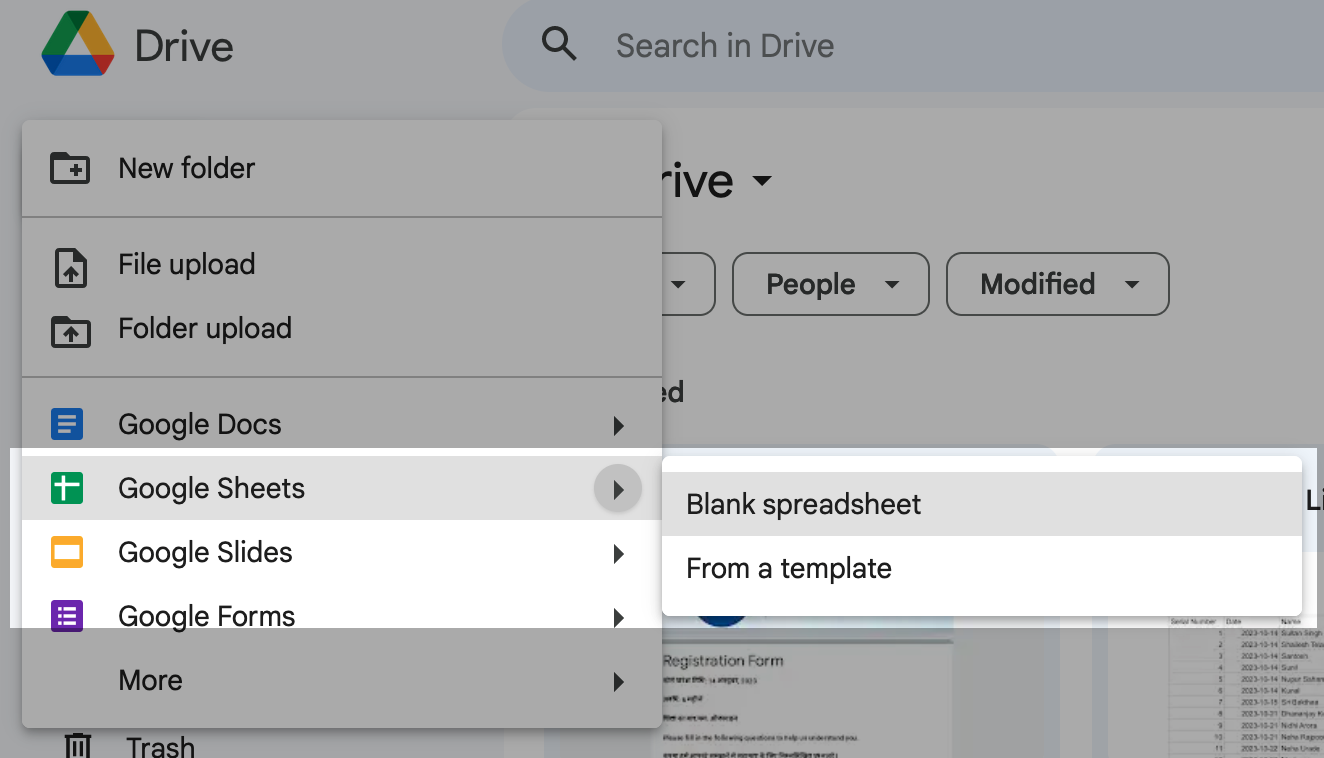
Google Sheet: New
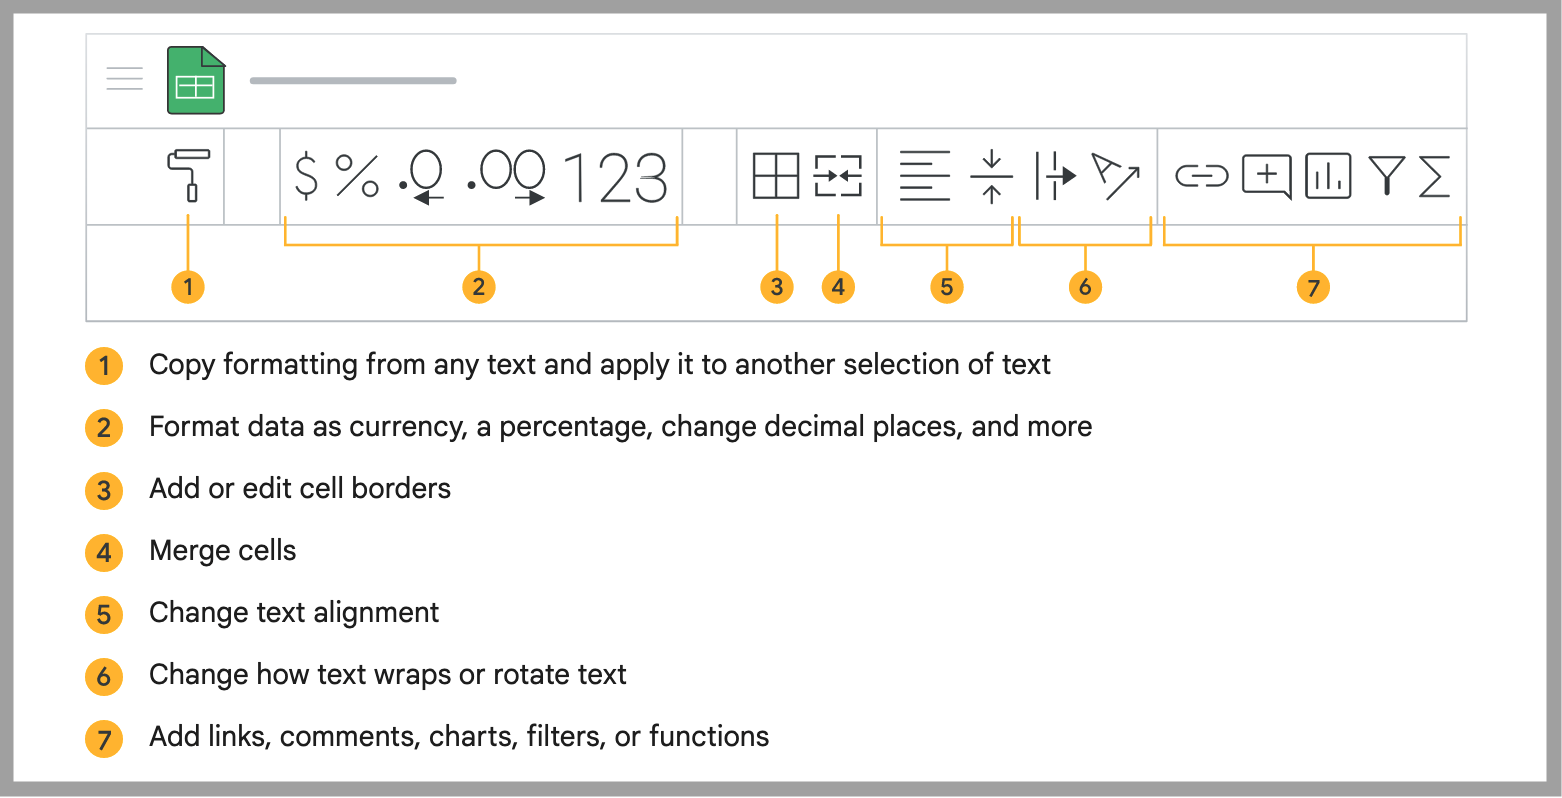
Google Sheet: Work with data
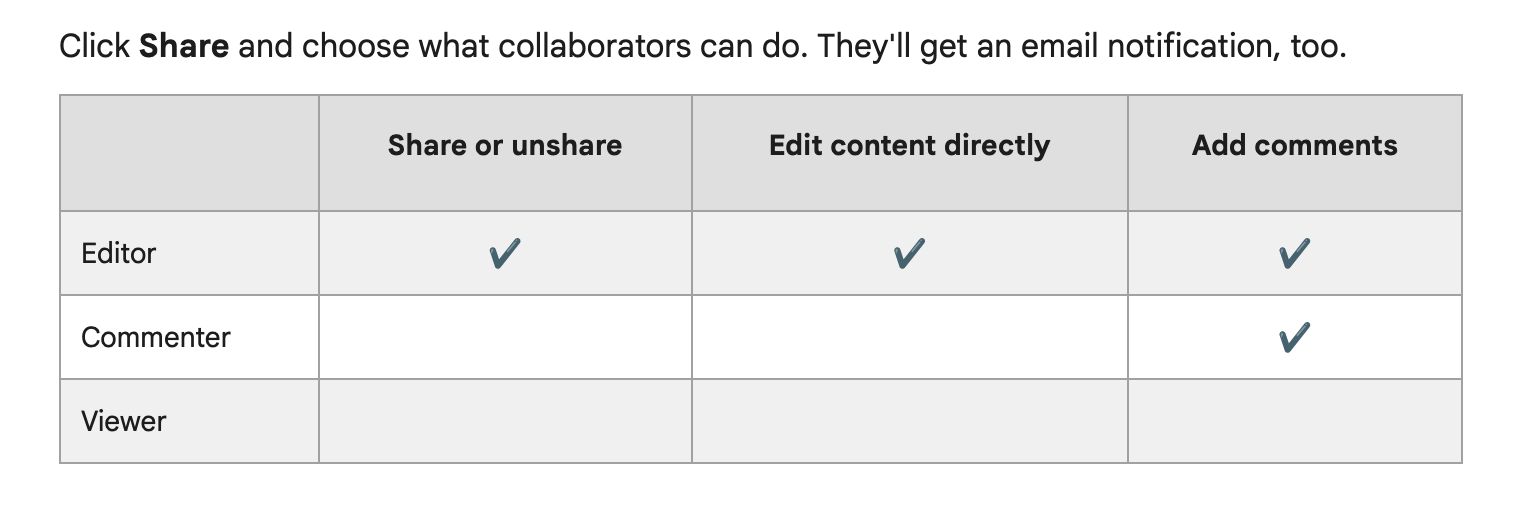
Google Sheet: Share
Google Sheet: Collabrate
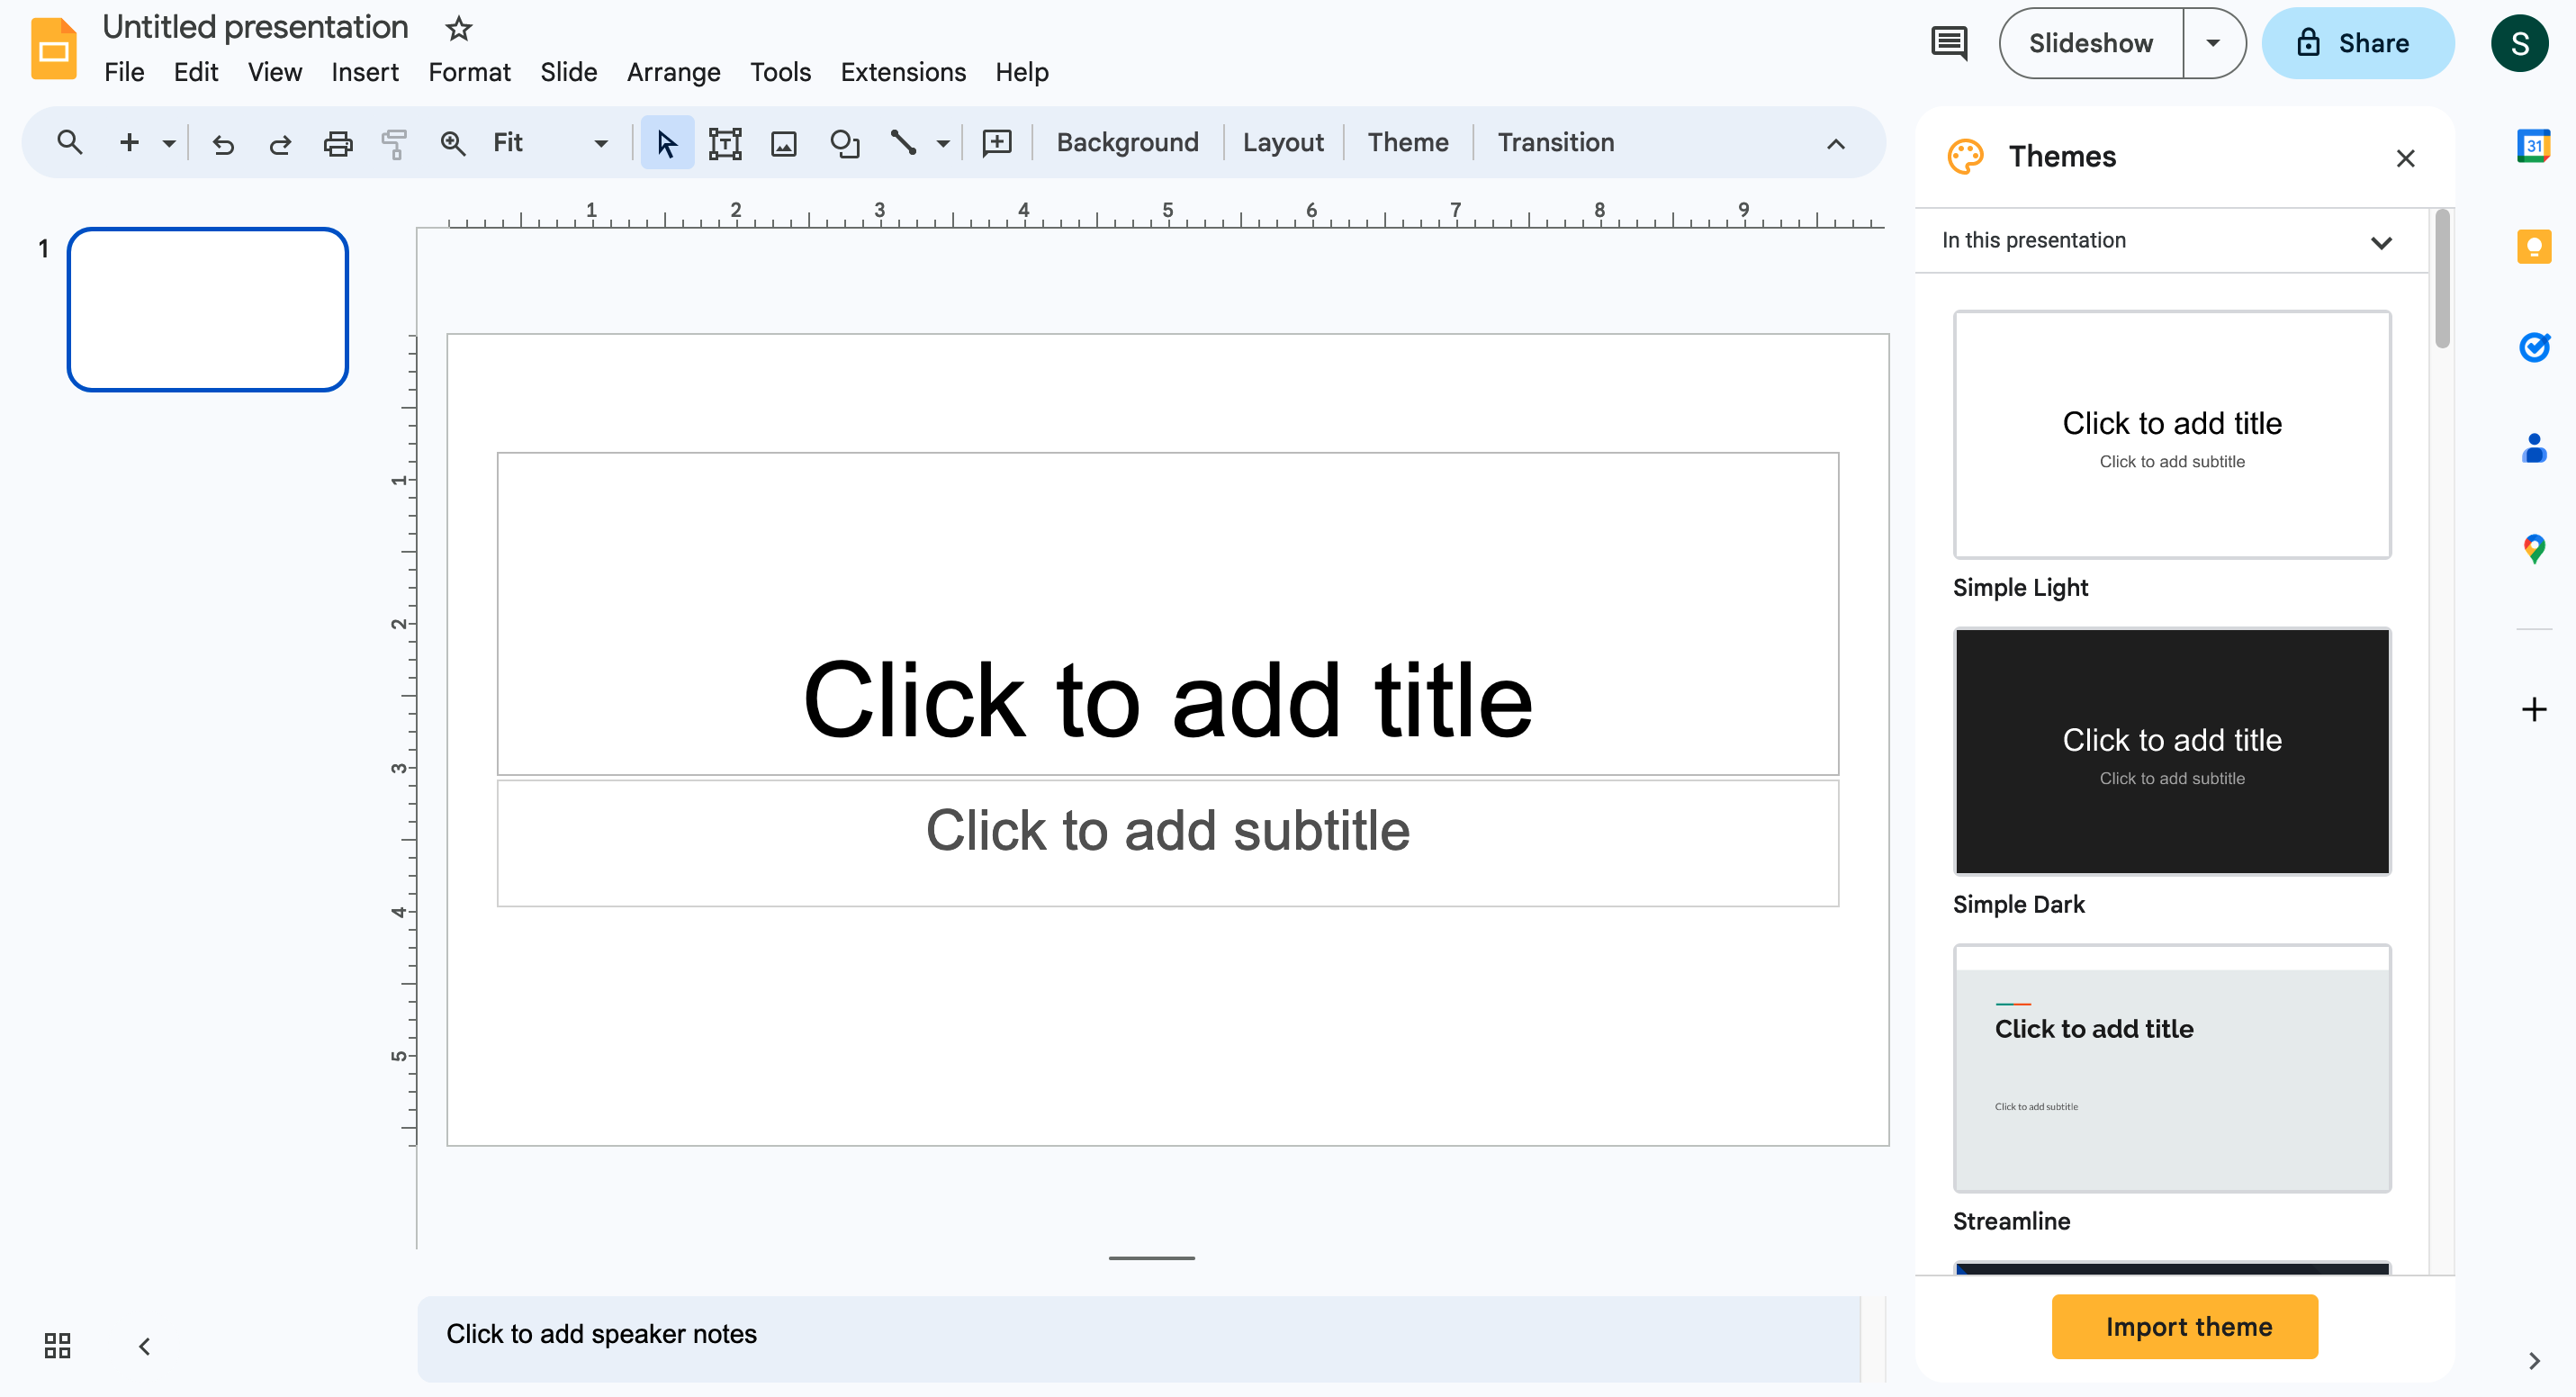
Google Slides
Create & collaborate with your team on professional pitch decks, project presentations, training modules, & more.
Google Slides: New
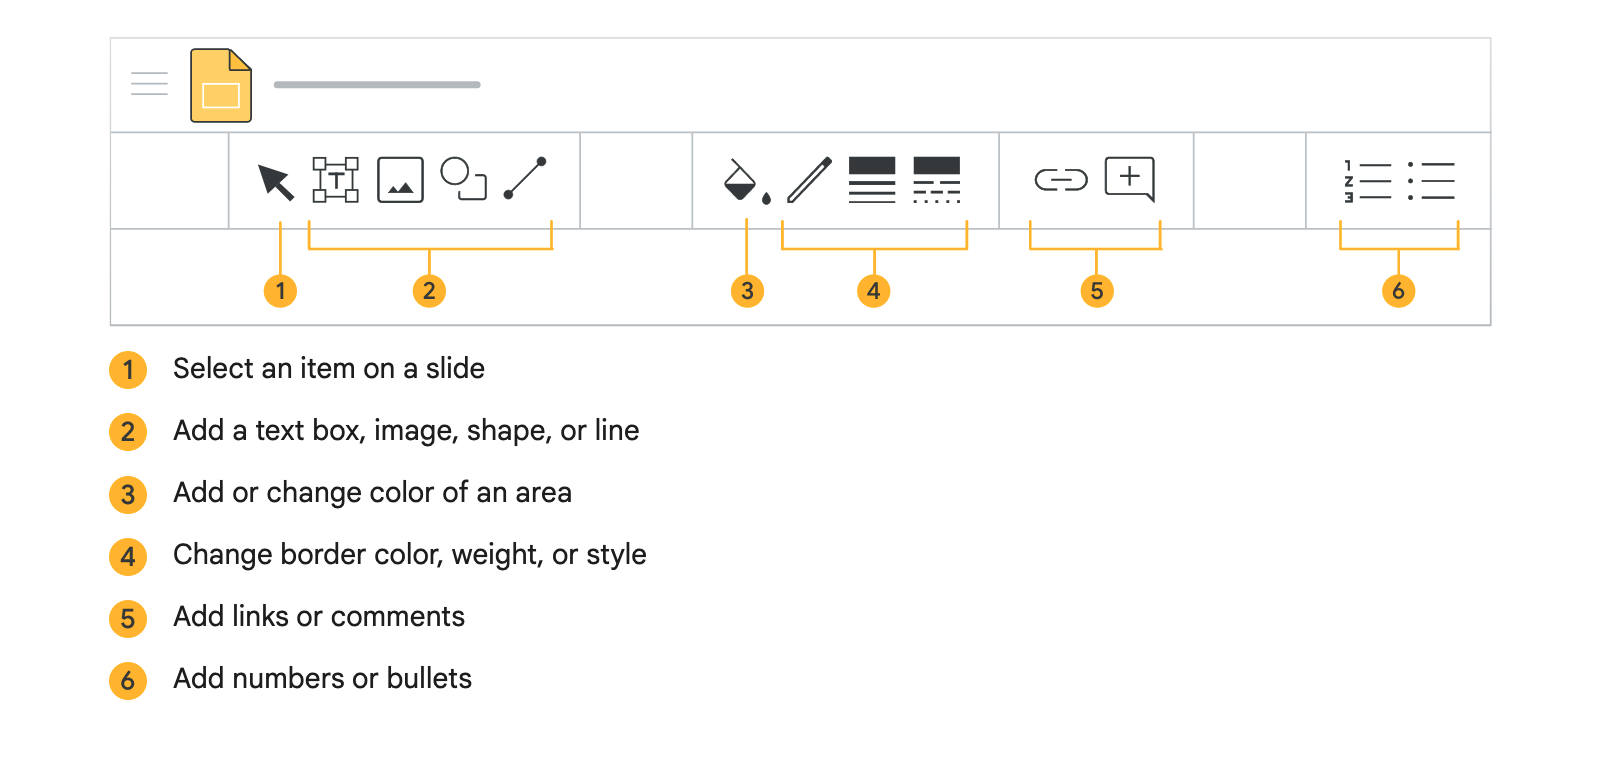
Google Slides:
Add and organize slides

Google Slides:
Add content to slides
Google Drive
Thank
You
![]()